Free Small Woodworking Projects for Space-Saving Creations

Free Small Woodworking Projects for Space-Saving Creations

Cramped living spaces don't have to mean sacrificing style and functionality. With a little ingenuity and some readily available materials, you can build amazing space-saving solutions. This article showcases free woodworking plans for compact, clever creations perfect for maximizing your home's potential without breaking the bank. Get ready to transform your tiny apartment or cluttered corner into a haven of organization and charm!

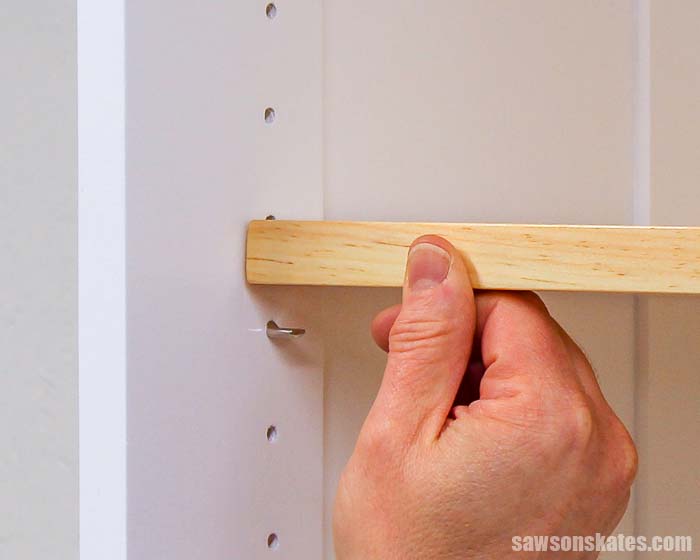
Wall-Mounted Folding Shelves

Tired of overflowing bookshelves dominating your living room? These wall-mounted folding shelves provide elegant storage that disappears when not in use. The free plans you'll find online typically use simple joinery techniques, perfect for beginners. Choose a sleek wood like pine or birch for a contemporary look, or opt for reclaimed wood for a rustic feel. Remember to carefully measure your wall space before starting to ensure a perfect fit. The folding mechanism relies on simple hinges and sturdy brackets, adding a surprising element of functionality to an otherwise simple design. After you've completed the project, watch as your clutter melts away, replaced by clean lines and thoughtful organization.

Materials You'll Need:

  • Wood boards (pine, birch, or reclaimed wood)
  • Hinges
  • Brackets
  • Wood screws
  • Wood glue
  • Sandpaper
  • Wood finish (optional)

A Nifty Key Holder

Misplacing keys is a common frustration. This small, yet impactful woodworking project solves that problem with style. Numerous free plans are available for creating a charming key holder that adds a touch of personality to your entryway. Imagine a small, uniquely shaped piece of wood, carefully sanded and finished, mounted on your wall. This compact creation, featuring hooks for your keys and maybe even a small shelf for mail, adds practicality and visual appeal to even the smallest hallway. This project is quick to complete, making it perfect for a weekend afternoon, leaving you with a satisfying sense of accomplishment and a more organized entryway.

Tips for Success:

  • Choose a wood type that complements your home's decor.
  • Use strong hooks designed for daily use.
  • Sand the wood thoroughly for a smooth finish.
  • Apply a protective finish to enhance durability.

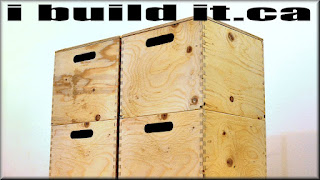
Under-the-Bed Storage Boxes

Maximize your storage space by building custom under-bed storage boxes. These boxes, made from sturdy plywood or solid wood, slide easily under your bed, keeping items neatly organized and out of sight. Free plans often provide detailed instructions for constructing boxes with removable lids or sliding drawers, offering versatile storage options. Customize the size and shape to perfectly fit your bed frame and storage needs, choosing from various staining and finishing techniques to match your bedroom décor. This project proves that functional storage can be both practical and aesthetically pleasing. You'll be amazed by the extra space you create by using that often-forgotten area under your bed.

Consider These Details:

  • Measure the space under your bed carefully.
  • Use strong joinery to ensure durability.
  • Add handles or cutouts for easy access.
  • Consider lining the boxes with fabric for extra protection.

These are just a few examples of the many space-saving woodworking projects you can tackle using free plans readily available online. With a little time and effort, you can transform your home into a more organized and stylish space, proving that small projects can have a big impact!

Share:

Reclaimed Pallet Wood Wall Decor

Reclaimed Pallet Wood Wall Decor: A Comprehensive Guide to Design and Application

The burgeoning popularity of reclaimed wood in interior design speaks volumes about the contemporary appreciation for sustainability and rustic aesthetics. Among the most readily accessible and versatile sources of reclaimed wood are shipping pallets. These ubiquitous wooden structures, once destined for demolition, are now finding new life as striking and unique pieces of wall decor. This comprehensive guide explores the multifaceted world of reclaimed pallet wood wall decor, encompassing the selection process, preparation techniques, design considerations, and application methods to achieve sophisticated and visually arresting results.

Sourcing and Selection of Reclaimed Pallets

The foundation of any successful project lies in the quality of the materials used. Selecting appropriate pallets is crucial, as their condition directly impacts the final aesthetic and longevity of the wall decor. Not all pallets are created equal. Some may be treated with chemicals rendering them unsuitable for indoor use, while others may be damaged or infested with pests. Therefore, a discerning approach is paramount.

Identifying Suitable Pallets

Prioritize pallets marked with the HT stamp (heat treated). This signifies that the wood has undergone a heat treatment process to eliminate pests and pathogens, making it safe for indoor application. Avoid pallets marked with MB (methyl bromide) as this chemical is harmful to human health. Visually inspect the pallet for signs of damage, including significant cracks, warping, rot, or insect infestation. The wood should be relatively sound and free from excessive weathering or decay.

Sourcing Locations

Several avenues exist for sourcing reclaimed pallets. Directly contacting businesses such as shipping companies, warehouses, or construction sites can provide access to a wide range of pallets. However, it’s imperative to obtain permission before collecting any pallets. Alternatively, online marketplaces and classified advertisements can offer another avenue for procurement, albeit with potential logistical considerations.

Assessing Wood Quality and Type

The type of wood used in pallets can vary considerably. While common softwoods like pine are frequently used, some pallets may incorporate harder woods. Inspect the wood for its grain pattern, color, and overall texture. This will influence the aesthetic appeal of the final product. The wood’s condition significantly impacts the ease of preparation and its suitability for specific design elements. Damaged or heavily weathered wood may require more extensive preparation and finishing.

Preparation and Treatment of Reclaimed Pallet Wood

Before embarking on the design phase, thorough preparation of the reclaimed pallet wood is essential. This involves cleaning, sanding, and potentially treating the wood to ensure its durability and safety. Neglecting this stage can compromise the longevity and visual appeal of the final product.

Cleaning and Disinfection

Begin by removing any loose nails, staples, or debris from the pallet using a hammer, pliers, and a pry bar. Thoroughly clean the wood using a stiff brush and a suitable cleaning agent to remove dirt, grime, and any lingering residues. A solution of warm water and mild detergent usually suffices. For added sanitation, especially with pallets of uncertain origin, consider using a diluted bleach solution (always follow safety precautions when handling bleach). Allow the wood to dry completely before proceeding.

Sanding and Smoothing

Sanding is crucial for achieving a smooth surface and preparing the wood for finishing. Begin with coarser sandpaper (e.g., 80-grit) to remove any splinters or rough patches. Gradually progress to finer grits (e.g., 120-grit, then 220-grit) to achieve a progressively smoother finish. Pay close attention to edges and corners to eliminate any potential hazards. A random orbital sander can significantly expedite this process, but manual sanding ensures attention to detail.

Treatment and Finishing

The choice of treatment and finishing depends on the intended use and location of the wall decor. For indoor applications, a clear sealant or wood stain can enhance the natural beauty of the wood while protecting it from moisture and damage. A protective finish also prevents splintering and improves the longevity of the piece. Outdoor applications require more robust weather-resistant treatments, potentially including specialized outdoor wood stains and sealants designed to withstand UV exposure and moisture.

Design Considerations and Creative Applications

The versatility of reclaimed pallet wood allows for a broad spectrum of design possibilities. From simple and rustic designs to more complex and intricate creations, the potential is only limited by imagination and skill. Careful planning and consideration of the overall aesthetic are key to achieving a visually cohesive and impactful result.

Simple and Rustic Designs

Simple designs can highlight the natural beauty of the reclaimed wood. Consider creating a rustic wall shelf by attaching individual planks to the wall using brackets. Alternatively, a series of horizontally arranged planks can form a striking backdrop. The natural variations in color and texture of the wood contribute to the rustic charm.

Geometric and Intricate Designs

More ambitious designs can incorporate geometric patterns or intricate arrangements. Individual planks can be cut and assembled to create geometric shapes, forming a unique and visually engaging composition. This requires precise cutting and careful planning to ensure alignment and overall harmony. More complex projects may benefit from pre-planning using sketches or digital design software.

Combining with Other Materials

Combining reclaimed pallet wood with other materials can create a unique blend of textures and styles. Incorporating metal elements, such as brackets or decorative hardware, can add a contrasting industrial touch. Similarly, the combination of wood and fabric, perhaps incorporating woven textiles, creates a warm and inviting aesthetic. The use of complementary colors and materials enhances the overall visual impact.

Installation and Finishing Touches

The installation method depends on the design and the weight of the wall decor. For lighter pieces, strong adhesive may suffice. Heavier pieces, particularly shelves, require more robust attachment methods, such as screws or anchors. Ensure that the wall is capable of supporting the weight of the decor. Once installed, final touches, such as applying a final coat of sealant or adding decorative elements, contribute to the overall sophistication and visual appeal.

In conclusion, reclaimed pallet wood wall decor offers a sustainable and aesthetically pleasing alternative to conventional wall treatments. By carefully selecting pallets, preparing the wood effectively, and exercising creativity in the design phase, one can create unique and captivating pieces that enrich any living space. The process, although requiring time and attention to detail, rewards the creator with the satisfaction of transforming discarded materials into beautiful and functional works of art.

Share:

How to Build Wooden Storage Boxes for Organization and Storage

Building Your Own Awesome Wooden Storage Boxes: A Step-by-Step Guide

Okay, so you're looking to get organized, and you've decided that some beautiful, handcrafted wooden storage boxes are the answer. Fantastic choice! Not only are they practical, but they add a touch of rustic charm wherever you put them. And guess what? Building them yourself isn't as hard as you might think. Let's dive in!

Planning Your Perfect Wooden Boxes

Before you even think about touching a saw, you need a plan. This isn't rocket science, but a little forethought goes a long way.

Choosing Your Wood

The type of wood you choose will affect the look, durability, and price of your boxes. Pine is a popular choice because it's relatively inexpensive and easy to work with. Cedar is lovely and smells amazing, but it’s more costly. Hardwoods like oak or maple will be stronger and more expensive still, but they'll last for ages. Consider where you'll use the boxes â€" a rustic-looking pine box might be perfect for the garage, while a sleek oak box might be better suited for a living room.

Designing Your Box

How big do you want your boxes? What shape? Do you need a lid? Will you add handles? Sketch out a few ideas on paper. Think about the dimensions: how tall, wide, and deep do you need them to be to fit your stuff? Even simple boxes benefit from a little planning. Consider making a couple of different sizes for versatility.

Gathering Your Tools and Materials

You'll need a few essential tools. Don't worry, you don't need a full-blown woodworking shop! Here's a basic list:

  • Measuring tape
  • Pencil
  • Saw (hand saw, circular saw, or jigsaw â€" choose what you’re comfortable with)
  • Wood glue
  • Clamps (at least two)
  • Sandpaper (various grits, from coarse to fine)
  • Screws or nails (depending on your preference)
  • Screwdriver or hammer
  • Safety glasses
  • Optional: Wood stain or paint, varnish or sealant

Remember to buy enough wood for your project, factoring in cuts and potential mistakes. It's always better to have a little extra than to run short!

Building the Box: A Step-by-Step Guide

Now for the fun part! Let's build a simple rectangular box with a lid. This method can be adapted for other shapes and sizes.

Cutting the Wood

Using your measurements, cut the wood for the sides, bottom, and lid of your box. Remember to cut accurately! A slightly inaccurate cut can make a big difference in the final product. For the sides, you'll need four pieces, two identical pairs. The bottom piece will be the size of the base of the box. The lid pieces will be slightly larger than the top of the box to allow for an overlap.

Assembling the Box

Apply wood glue to the edges of the bottom piece and the sides. Carefully clamp the sides to the bottom, ensuring they are square and aligned. Let the glue dry completely according to the manufacturer's instructions. This usually takes about an hour, but it’s better to err on the side of caution.

Adding the Lid

Once the box is assembled, create the lid. You can simply cut pieces to match the top of the box and assemble it in the same way as the base. For a more secure fit, cut the lid slightly larger than the top opening, allowing for a slight overlap. You can then use hinges to attach the lid. If you’re not using hinges, consider adding small wooden cleats or a simple rabbet joint to the lid and box for a snug fit.

Sanding and Finishing

Once the glue is completely dry, use sandpaper to smooth out any rough edges or imperfections. Start with coarser sandpaper and gradually move to finer grits for a smoother finish. Then, you can add a personal touch! You can stain the box, paint it, or leave it with a natural wood finish. A sealant or varnish will protect your beautiful creation and make it more durable.

Adding Extra Touches (Because Why Not?)

Now that you have a basic box, let's talk about jazzing it up!

Handles

Adding handles makes your boxes much easier to carry. You can find pre-made handles at most craft stores, or get creative and make your own from leather or rope.

Decorative Elements

Get creative! You could add inlays, burn designs into the wood, or paint decorative patterns. The possibilities are endless!

Metal Corners

For extra durability, especially with heavier boxes, consider adding metal corner protectors. These add a nice, professional touch too.

Commonly Asked Questions

Here are some frequently asked questions to help you along your woodworking journey.

Q: What type of wood glue should I use?

A: A good quality wood glue, like Titebond, is a reliable choice.

Q: How long should I let the glue dry?

A: Always follow the manufacturer's instructions on the glue you're using. It's usually at least an hour but can be longer depending on the type of glue and the temperature.

Q: Can I use nails instead of screws?

A: Yes, you can use nails, but screws generally provide a stronger and more secure joint.

Q: What if my box isn't perfectly square?

A: Don't worry too much about minor imperfections! With practice, you'll get better at making perfectly square boxes. For now, careful sanding and finishing can help disguise minor flaws. You can also use clamps to help ensure square joints while the glue dries.

Q: Where can I find more detailed plans?

A: You can find many detailed woodworking plans online, in woodworking magazines, and in woodworking books. A quick search for "simple wooden box plans" will give you tons of options!

So there you have it! Building your own wooden storage boxes is a rewarding experience. Don't be afraid to experiment and have fun with it. With a little patience and effort, you'll soon have beautiful, custom-made boxes to keep your belongings organized and add a personal touch to your home.

Share:

Small Christmas Wood Craft Ideas for Gifts

Small Christmas Wood Craft Ideas for Gifts

Small Christmas Wood Craft Ideas for Gifts

The holiday season is a time for giving, and what better way to express your love and appreciation than with a handcrafted gift? Wood crafts offer a unique and thoughtful way to celebrate Christmas, bringing warmth and a touch of rustic charm to your loved ones’ homes. Whether you're a seasoned woodworker or just starting out, these small wood craft ideas are perfect for crafting delightful Christmas gifts that are sure to be cherished.

Rustic Christmas Ornaments

Ornaments are a classic Christmas decoration that add a touch of festive cheer to any tree. Wooden ornaments offer a unique and sustainable alternative to traditional plastic ornaments, adding a touch of rustic charm to your holiday decor. These ornaments can be personalized with initials, dates, or special messages, making them a truly meaningful gift.

Simple Shapes:

Begin with simple shapes like stars, snowflakes, hearts, or even Christmas trees. Cut these shapes using a jigsaw or scroll saw, sanding the edges for a smooth finish. You can paint them with festive colors or leave them natural for a rustic look. Add embellishments like glitter, ribbons, or tiny bells for a personalized touch.

Personalized Ornaments:

For a unique touch, personalize your ornaments with names, dates, or meaningful quotes. You can use a wood-burning tool to etch designs or letters onto the surface. Alternatively, use paint pens or stencils to create personalized messages or images.

Natural Wood Ornaments:

Embrace the natural beauty of wood by leaving the ornaments unpainted. Sand the wood smooth and consider adding a natural oil finish to enhance its grain. These ornaments can be decorated with dried berries, cinnamon sticks, or pine cones for a rustic and elegant look.

Wooden Christmas Coasters

Wooden coasters add a touch of warmth and elegance to any coffee table. These small crafts make excellent gifts, especially for coffee enthusiasts or those who love to host gatherings.

Simple Square or Round Coasters:

Start with basic square or round shapes, using a jigsaw or scroll saw for cutting. Sand the edges smoothly, and consider adding a protective coat of varnish or sealant to prevent water damage.

Personalized Coasters:

Add a personal touch to your coasters by engraving initials, dates, or festive designs. You can also use paint pens to create intricate patterns or holiday motifs.

Rustic Coasters with Natural Elements:

For a truly rustic look, incorporate natural elements such as river rocks, pine cones, or bark into your coasters. Secure these elements using wood glue and create a unique and natural design.

Miniature Wooden Christmas Trees

Small wooden Christmas trees bring a touch of festive charm to any home. These miniature trees can be placed on shelves, mantles, or even used as unique table centerpieces.

Simple Triangle Shapes:

Start by cutting out triangle shapes from wood, using a jigsaw or scroll saw. Sand the edges smoothly and consider painting them with festive colors or leaving them natural.

Layered Trees:

Create a layered effect by cutting out several triangle shapes of varying sizes. Glue these shapes together, starting with the largest triangle at the base, to create a tiered effect.

Decorated Trees:

Embellish your miniature trees with beads, ribbons, or tiny ornaments. You can also use paint pens to add details or patterns to the trees.

Wooden Christmas Sign

Wooden signs are a wonderful way to add a festive touch to any home. You can create a simple sign with a seasonal message, a personalized greeting, or even a humorous holiday quote.

Simple Rectangular or Round Sign:

Begin with a simple rectangular or round wooden board. Use a scroll saw to cut out intricate shapes, or use a wood-burning tool to create designs.

Personalized Sign:

Add a personal touch to your sign with a name, a special message, or a quote. You can use a wood-burning tool to etch letters and designs, or use paint pens or stencils to create personalized messages.

Festive Sign with Ornaments:

Decorate your sign with small Christmas ornaments, ribbons, or pine cones. You can attach these decorations using hot glue or glue dots, adding a festive touch to the sign.

Tips for Creating Your Wood Crafts

Here are some tips to help you create beautiful and lasting wood crafts for your loved ones this Christmas:

  • Choose the right wood: Consider the type of wood you want to use. Softwoods like pine and cedar are easy to work with and are often affordable. Hardwoods like maple and oak are more durable and offer a beautiful grain, but they are also more challenging to work with.
  • Safety first: Always wear safety glasses and a dust mask when working with wood, especially when using power tools.
  • Start with simple designs: If you are new to woodworking, start with simple shapes and designs before moving on to more intricate projects.
  • Sanding is key: Sanding your projects smooth ensures a professional finish and a comfortable feel. Use a variety of sandpaper grits, starting with a coarser grit to remove imperfections and finishing with a finer grit for a smooth surface.
  • Finish your work: A protective finish helps to protect your wood crafts from water damage, scratches, and dirt. Consider using a sealant, varnish, or wax to enhance the look of your crafts.

With these ideas and a little bit of creativity, you can create unique and meaningful Christmas gifts from wood that will be cherished for years to come. Embrace the joy of crafting and give the gift of warmth, creativity, and love this holiday season.

Share:

Step-by-Step Guide to Making Wooden Coffee Tables for Sale

Step-by-Step Guide to Making Wooden Coffee Tables for Sale

Crafting Wooden Coffee Tables for Sale: A Step-by-Step Guide

Building wooden coffee tables not only offers a rewarding creative outlet, but also presents a fantastic opportunity to generate income. Whether you're a seasoned woodworker or a beginner with a passion for craftsmanship, this guide will walk you through the process, step by step.

Planning Your Wooden Coffee Table

Design Inspiration

Before picking up a saw, let your imagination run wild. Browse furniture stores, online platforms, and design blogs for coffee table styles that inspire you. Consider the target audience, the current furniture trends, and your personal design aesthetic. Sketch out your ideas and experiment with different shapes, sizes, and wood types.

Material Selection

Choose wood that complements your design and budget. Hardwoods like oak, maple, and walnut offer durability and beautiful grain patterns. Softer woods like pine and cedar are more affordable and easier to work with. Factor in the cost of lumber, finishes, and hardware, while considering the final selling price.

Dimensions and Construction

Determine the dimensions of your coffee table, considering the average height and size of furniture in most homes. Decide on the construction method: a simple frame and top design, a more intricate design with drawers or shelves, or a unique combination of both. Draw detailed plans, including the cuts, joints, and assembly process.

Gathering Your Tools and Materials

Invest in quality tools that will last and serve you well. Here's a comprehensive list of essential tools and materials:

  • Power Tools: Table saw, miter saw, router, drill press, orbital sander
  • Hand Tools: Measuring tape, pencil, combination square, chisel set, hammer, mallet, screwdriver, hand sander
  • Wood: Your chosen wood type, ensuring enough for the table and any additional components like shelves or drawers
  • Hardware: Wood glue, screws, nails, hinges (if applicable), drawer slides (if applicable)
  • Finishes: Wood stain, wood sealer, polyurethane or varnish, paint (optional), brushes and rags

Building Your Coffee Table

Cutting and Shaping the Wood

Precisely cut the wood according to your plans. Use the table saw or miter saw for straight cuts and the router for shaping edges and creating decorative details. Always wear safety glasses and hearing protection.

Assembly

Join the pieces using glue and screws for strong and durable construction. If using complex joinery, consult woodworking resources for proper techniques. Sand down any rough edges and surfaces to prepare for the finishing process.

Finishing

Follow the instructions on the chosen wood stain, sealer, or varnish. Apply multiple coats for a smooth and durable finish. Sand lightly between coats for a flawless look. Let the finish dry completely before moving to the final step.

Marketing and Selling Your Coffee Table

Take high-quality photos of your completed coffee table, highlighting its unique features and craftsmanship. Create a compelling description highlighting the materials used, design details, and potential uses.

Online Marketplaces

Sell your coffee table online through platforms like Etsy, Facebook Marketplace, or Craigslist. Offer competitive prices and detailed shipping information for a seamless customer experience.

Local Craft Fairs and Galleries

Showcase your coffee table at local craft fairs or galleries. This allows you to connect with potential customers directly, answer their questions, and showcase your work personally.

Social Media Marketing

Utilize Instagram, Pinterest, and Facebook to promote your coffee tables. Share photos and videos, engage with followers, and offer behind-the-scenes glimpses into your woodworking process.

Share:

How to Make Floating Shelves with Built-In Lighting for Extra Style

How to Make Floating Shelves with Built-In Lighting for Extra Style

Elevate Your Home Décor with Floating Shelves and Built-In Lighting

Floating shelves are a popular choice for homeowners seeking a modern and minimalist look. They offer a stylish way to display your treasured belongings while maximizing space in your home. But what if you could elevate your floating shelves to the next level by adding built-in lighting? This unique feature not only adds a touch of sophistication but also creates an inviting and cozy ambiance.

In this article, we'll guide you through the process of building floating shelves with built-in lighting, empowering you to transform your living space into a haven of style and functionality. You'll learn the necessary tools and materials, follow step-by-step instructions, and discover creative lighting options to enhance your shelves.

Choosing Your Materials and Tools

Before embarking on your project, gather the necessary materials and tools to ensure a smooth and successful process. Here's a comprehensive list to get you started:

Materials:

  • Wood boards for shelves (choose the thickness and length based on your design)
  • Wooden cleats for support (select a size that matches the thickness of your shelves)
  • LED strip lights (consider length, color temperature, and brightness)
  • LED strip light power supply (ensure the output matches your LED strip lights)
  • Wood glue
  • Screws (choose the right length and size for your materials)
  • Paint or stain (optional)
  • Wood filler
  • Sandpaper (various grits)
  • Measuring tape
  • Level
  • Pencil
  • Drill
  • Saw (for cutting wood boards)
  • Safety goggles and gloves

Step-by-Step Guide to Building Floating Shelves with Built-In Lighting

Now that you have all the materials and tools ready, follow these step-by-step instructions to create your own stunning floating shelves with built-in lighting:

Step 1: Measure and Cut Your Shelves and Cleats

Measure the desired length and width of your shelves, ensuring you have enough space on the wall for your design. Mark the dimensions on your wooden boards and carefully cut them using a saw. Repeat this process for your cleats, ensuring their length corresponds to the thickness of your shelves. For added support, consider using two cleats per shelf. Make sure all your cuts are precise for a seamless and elegant look.

Step 2: Install the Cleats

Locate the desired position of your shelves on the wall, using a level to ensure they are perfectly horizontal. Mark the wall using a pencil where you'll install your cleats. Drill pilot holes into the wall, ensuring they are slightly smaller than your screws. Attach your cleats to the wall using screws and a drill. Use a level to ensure the cleats are perfectly horizontal and firmly secured to the wall.

Step 3: Attach the LED Strip Lights to the Shelves

Before securing your shelves, attach the LED strip lights. Carefully measure the length of your shelves and cut the LED strip lights to the desired size, ensuring you leave enough space for the power supply. Clean the underside of your shelves thoroughly and apply a thin line of wood glue along the edges where you'll attach the LED strip lights. Press the LED strip lights firmly onto the glued surface, ensuring they are securely attached. Leave the glue to dry completely before moving to the next step.

Step 4: Secure the Shelves to the Cleats

Carefully lift your shelves and position them on the cleats. Ensure they align perfectly with the cleats and are resting securely. Using your drill, attach the shelves to the cleats by screwing them together. If you used two cleats per shelf, make sure to secure the shelves to both cleats for maximum support.

Step 5: Connect the LED Strip Lights to the Power Supply

Now that your shelves are securely mounted, it's time to connect the LED strip lights to the power supply. Plug the power supply into an outlet and connect the LED strip lights to the power supply. Carefully hide the power cord behind the shelf or within the wall, ensuring it is safely secured and out of sight. Test the LED lights to ensure they are working properly and to your satisfaction.

Step 6: Finishing Touches (Optional)

To complete your floating shelves, consider adding some finishing touches. You can paint or stain the shelves to match your existing décor or create a personalized look. You can also use wood filler to cover any imperfections and sand the shelves to ensure a smooth finish. Once you're happy with the final look, you can begin showcasing your beloved items on your newly built floating shelves.

Creative Lighting Ideas

Embrace your creativity and experiment with different lighting options to enhance the ambiance of your shelves and transform your space. Here are a few inspiring ideas:

  • Warm White Lighting: Create a cozy and inviting atmosphere with warm white LED strip lights, perfect for living rooms or bedrooms.
  • Cool White Lighting: Opt for cool white LED strip lights to illuminate artwork or create a more modern and contemporary feel in your kitchen or office.
  • Color-Changing LED Strip Lights: Add a touch of excitement and playfulness with color-changing LED strip lights, allowing you to adjust the mood and ambiance according to your preference.
  • Recessed Lighting: For a more integrated look, consider incorporating recessed LED lights into the shelves, creating a sophisticated and minimalist design.

By adding built-in lighting to your floating shelves, you elevate your home décor to new heights, creating a stylish and functional space that you'll love for years to come. Let your creativity soar and enjoy the process of building your own unique and personalized shelves that will be the envy of your family and friends. Remember, safety is paramount, so wear protective gear and work carefully throughout the project.

Share:

How to Make Wall Shelves with Adjustable Height for Flexibility

How to Make Wall Shelves with Adjustable Height for Flexibility

How to Make Wall Shelves with Adjustable Height for Flexibility

Imagine a wall that seamlessly adapts to your ever-changing needs. Wall shelves with adjustable height offer the perfect solution, allowing you to create a personalized storage system that can evolve alongside your lifestyle. This project blends practicality and style, empowering you to transform your space into a well-organized haven. Let's embark on this DIY adventure together!

Materials and Tools

Before diving into the construction, gather your essential tools and materials. This comprehensive list ensures you're well-equipped for the project:

  • Wooden boards (choose your preferred wood type and thickness for the shelves)
  • Metal brackets (select brackets with adjustable height features)
  • Screws (ensure they are appropriate for the wood and brackets)
  • Level
  • Measuring tape
  • Pencil
  • Drill with drill bits
  • Saw (for cutting the wooden boards to your desired lengths)
  • Sandpaper (for smoothing any rough edges)
  • Wood stain or paint (optional, for adding a decorative touch)

Steps to Building Adjustable Wall Shelves

Now, let's get our hands dirty and build those versatile shelves. Follow these detailed steps:

1. Determine Shelf Placement and Size

Start by visualizing the ideal placement of your shelves. Consider the items you want to store, the available wall space, and the overall aesthetics of your room. Measure the desired width and depth of each shelf. Note that the width should correspond to the chosen brackets. Remember to factor in the thickness of the wooden board when calculating the overall height.

2. Cut the Wooden Boards

Utilizing your saw, carefully cut the wooden boards to the measured lengths for each shelf. Remember to cut a few inches longer than the desired width to allow for overhang and better support. After cutting, use sandpaper to smoothen any rough edges, ensuring a polished look.

3. Mark and Attach Brackets

With a pencil, mark the desired locations for the brackets on the wall. Ensure they are level using a spirit level. Drill pilot holes at the marked spots to prevent wood splitting when attaching the brackets with screws. Secure the brackets firmly to the wall, making sure they are well-supported.

4. Install Shelves and Adjust Height

Slide the shelves onto the brackets, making sure they are positioned securely. Adjust the height of each shelf by moving the brackets up or down. This flexibility allows you to accommodate different sized items, creating a custom storage solution.

5. Finishing Touches

Once the shelves are in place, you can personalize their appearance with a wood stain or paint. Choose colors that complement your existing décor and elevate the overall aesthetic of your space. Allow the stain or paint to dry completely before adding your cherished possessions to the shelves.

Tips for Success

Here are a few handy tips to ensure your adjustable wall shelf project is a resounding success:

  • Select sturdy brackets that can support the weight of your belongings.
  • Double-check measurements to guarantee a perfect fit for your shelves.
  • Choose a wood type that complements your room's style and durability needs.
  • Consider adding a back panel to the shelves for a more polished look.
  • Use protective gear, such as gloves and safety glasses, during the project.

Conclusion

Congratulations! You have successfully created adjustable wall shelves that are not only functional but also visually appealing. These shelves are a testament to your DIY prowess and offer endless possibilities for organizing and displaying your prized possessions. Now, enjoy the flexibility and style of your newly crafted storage solution!

Share:

Popular Posts

Search This Blog

Powered by Blogger.

Featured Post

Free Small Woodworking Projects for Space-Saving Creations

Free Small Woodworking Projects for Space-Saving Creations Cramped living spaces don't have to mean sacrificing style and functionalit...

Recent Posts

Sample Text


Pages