How to Design a Firewood Rack from Pallets for Maximum Efficiency

How to Design a Firewood Rack from Pallets for Maximum Efficiency

Design a Firewood Rack from Pallets for Maximum Efficiency

Tired of haphazardly stacked firewood cluttering your yard? Building a firewood rack from repurposed pallets is a budget-friendly and eco-conscious way to organize your fuel source while adding a rustic touch to your outdoor space. This guide will walk you through designing and constructing an efficient firewood rack that maximizes storage space and elevates your firewood organization game.

Gather Your Materials

Before you start wielding a hammer, gather the necessary tools and materials. This project is remarkably low-cost and requires minimal effort. Here's what you'll need:

  • Pallets: You'll need one or two pallets depending on the size of the rack you're aiming for. Opt for pallets in good condition, free of broken boards and loose nails.
  • Saw: A handsaw or circular saw will come in handy for cutting the pallet planks to size.
  • Hammer: This will be your primary tool for attaching the pallet planks to the frame.
  • Screws or Nails: Choose screws or nails that are long enough to penetrate both the pallet planks and the frame.
  • Measuring Tape: Essential for accurately measuring the pallet planks and ensuring your rack is the desired size.
  • Safety Gear: Wear safety glasses and gloves to protect yourself from splinters and flying debris.

Choose Your Pallet Design

The beauty of using pallets is their versatility. There are numerous design options, each with its own advantages. Here are a few popular styles to consider:

The Stacked Pallet Design

This design is the simplest and quickest to assemble. Simply stack two pallets on top of each other, ensuring they are aligned. This creates a spacious, freestanding rack that's ideal for smaller piles of firewood.

The Pallet Wall Design

For a more robust and decorative option, build a pallet wall. Disassemble the pallet, keeping the planks intact. Attach these planks to a sturdy frame made from wooden studs or metal pipes. This creates a visually appealing storage solution that can be personalized with paint or stain.

The Pallet Frame Design

This design offers maximum storage space. Disassemble the pallet, keeping the longest planks as the frame. Securely attach the shorter planks to the frame, creating an open grid-like structure that can hold large amounts of firewood.

Optimize Your Firewood Rack

Now that you've chosen your design, focus on optimizing your firewood rack for maximum efficiency. Here's how:

  • Consider Your Storage Space: Measure the area where you plan to place the rack to ensure it fits comfortably without obstructing walkways or other outdoor features.
  • Prioritize Accessibility: Design the rack to make loading and unloading firewood as easy as possible. Consider building a raised platform for easy access to the upper levels.
  • Enhance Stability: Use sturdy hardware to secure the pallet planks to the frame. For heavier firewood loads, you can even add additional support beams to prevent sagging.
  • Add a Roof (Optional): Protect your firewood from the elements by adding a simple roof constructed from corrugated metal sheets or tarpaulin. This will keep your wood dry and prevent it from cracking or rotting.

Give Your Rack a Finishing Touch

Once your rack is built, it's time to personalize it with a touch of your own style. Consider these finishing touches:

  • Paint or Stain: Enhance the natural beauty of the wood with a paint or stain that complements your outdoor decor.
  • Decorative Elements: Add a rustic touch with salvaged metal accents, old wagon wheels, or antique lanterns.
  • Lighting: Illuminate your firewood rack with solar-powered lights or string lights for a cozy and inviting ambiance.

Building a firewood rack from pallets is a rewarding project that combines functionality with environmental consciousness. With this guide as your compass, you'll have a sturdy and stylish rack to keep your firewood organized and ready for those cozy winter evenings by the fire.

Share:

Guide to building a magic box with secret compartments

Guide to building a magic box with secret compartments

Building a Magic Box with Secret Compartments

Step into the world of hidden treasures and intrigue with this guide to building a magic box with secret compartments. This project is perfect for aspiring illusionists, crafty hobbyists, and anyone seeking to add a touch of mystery to their belongings. We'll delve into the steps, materials, and techniques that will transform a simple box into a captivating object of wonder.

Choosing Your Box

Start by selecting a box that serves as the foundation for your magic box. The size and style of your box will depend on your intended purpose. For concealing small objects, a jewelry box or a small wooden box will suffice. For larger treasures, consider using a toolbox or an old book with a hollowed-out interior.

Material Options

You have a variety of material choices for your box. Consider using:

  • Wood: Provides a classic and sturdy base for your magic box.
  • Metal: Offers durability and a modern aesthetic.
  • Cardboard: Ideal for budget-friendly projects.

Designing the Secret Compartments

The heart of your magic box lies in the secret compartments. Before starting construction, sketch out your design on paper. Consider factors such as the size and shape of the compartments, their accessibility, and any hidden triggers or mechanisms.

Types of Compartments

There are several ways to design your secret compartments:

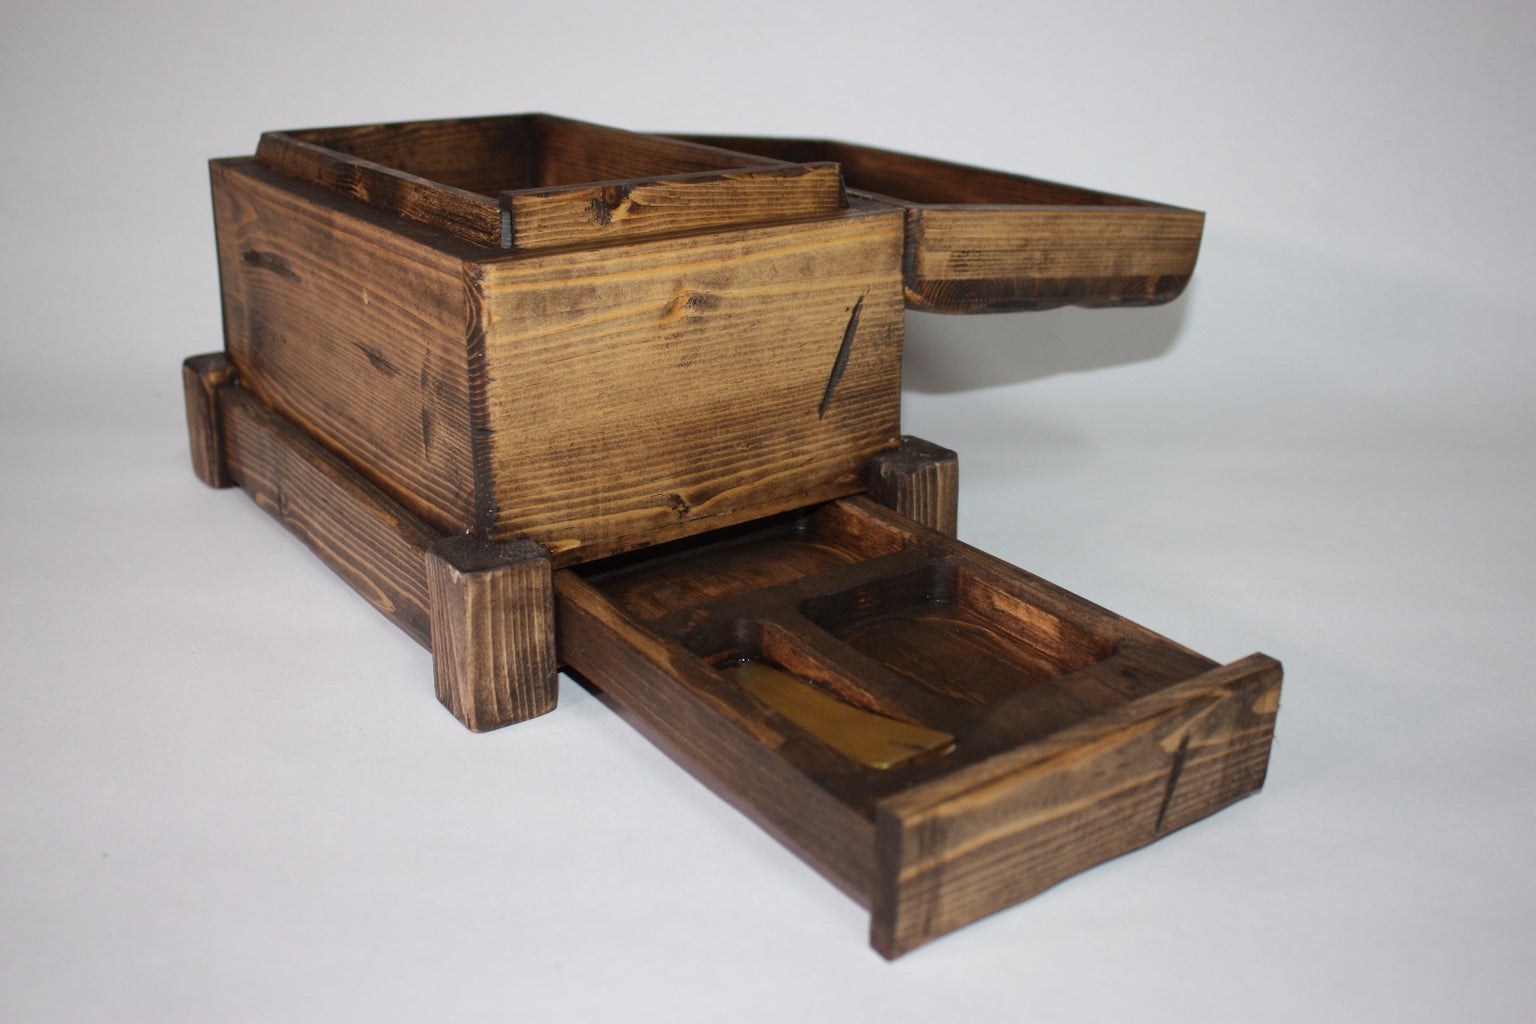
  • Sliding Compartments: These compartments move horizontally within the box, concealed behind a sliding panel.
  • Hidden Drawers: These drawers are cleverly disguised within the box's structure, appearing as a seemingly ordinary part of the box.
  • False Bottoms: These compartments are located beneath a removable section of the box's bottom.
  • Rotating Panels: A section of the box's side or top can be rotated to reveal a hidden compartment behind it.

Construction Techniques

Now comes the exciting part â€" building the compartments! The construction methods will vary based on the type of compartment you've chosen. For sliding compartments, use thin plywood or cardboard, carefully cut and attached with hinges or guides. For hidden drawers, consider using a sliding drawer mechanism or constructing a custom drawer that slides within a concealed track. False bottoms can be built using a separate panel attached with magnets or hinges.

Tools and Materials

Here's a list of essential tools and materials:

  • Saw: For cutting wood or cardboard.
  • Screwdriver: For attaching components.
  • Glue: For securing parts.
  • Hinges: For movable compartments.
  • Magnets: For securing false bottoms or hidden panels.
  • Paint or Stain: To finish the box and add an aesthetic touch.

The Finishing Touches

With your secret compartments built, it's time to add the finishing touches. Paint or stain the box to create a cohesive look. Use decorative details like knobs, locks, or hinges to further enhance the illusion. Consider using a decoy compartment â€" a compartment that seems functional but actually leads to nothing. This adds another layer of mystery to your magic box.

Conclusion

Congratulations! You have now crafted a magic box that holds secrets and wonders. Fill it with treasures, hidden messages, or playful tricks. With a little ingenuity and creativity, you've transformed a simple box into a captivating and imaginative object.

Share:

How to build a small grill gazebo for cozy outdoor meals

How to build a small grill gazebo for cozy outdoor meals

Creating a Cozy Outdoor Dining Haven: Building a Small Grill Gazebo

Imagine the scene: a warm summer evening, the scent of grilling food mingling with the sweet air, and you and your loved ones gathered around a charming outdoor dining space. This idyllic picture can become reality with the construction of a small grill gazebo, a cozy haven for outdoor meals that combines functionality and aesthetic appeal. Building your own gazebo presents a rewarding project that allows you to tailor the structure to your needs and preferences, transforming your backyard into an inviting oasis.

Planning Your Grill Gazebo: A Foundation for Success

Before embarking on the construction journey, a meticulous planning phase is crucial. This phase involves defining your vision for the gazebo and outlining the essential steps to bring it to life.

Determining the Gazebo's Purpose and Size

First, consider the primary function of your gazebo. Will it primarily serve as a grilling station, a dining area, or a combination of both? Understanding the intended use will guide the selection of the appropriate size and features. A smaller gazebo, ideally around 10 feet by 12 feet, could suffice for a compact grilling and dining setup. However, if you envision hosting larger gatherings, opt for a more spacious design.

Choosing the Right Location and Materials

Next, determine the ideal location for your gazebo. Select a spot that offers a pleasant view, sufficient sunlight, and easy access to electricity and water sources if needed. Furthermore, consider the prevailing wind direction and any potential obstacles like trees or fences.

The choice of materials will significantly influence the gazebo's appearance, durability, and maintenance requirements. Common choices include:

  • Wood: Offers a classic and timeless appeal, providing excellent aesthetic versatility. However, wood requires regular maintenance to prevent rot and weathering.
  • Metal: Durable and low-maintenance, metal offers a modern and sleek aesthetic. Aluminum is lightweight and rust-resistant, while steel provides greater strength.
  • Vinyl: Affordable and low-maintenance, vinyl is a popular choice for its durability and resistance to weather damage.
  • Fabric: For a more casual and temporary structure, fabric can be used for the roof and sides, offering flexibility and easy setup.

Sketching Your Gazebo Design

Once you have a clear vision of the gazebo's purpose, size, and materials, create a simple sketch or a detailed plan to illustrate the structure's layout. Consider incorporating features such as:

  • A dedicated grilling area: Include a countertop or a dedicated grilling platform within the gazebo.
  • A dining table and chairs: Ensure ample space for comfortable seating and dining.
  • Storage: Plan for shelving or cabinets to store grilling tools, tableware, and other essentials.
  • Lighting: Incorporate lighting fixtures to illuminate the gazebo for evening use.
  • Ceiling fan: Consider a ceiling fan to provide air circulation and comfort on warm days.
  • Side panels: Include retractable side panels to offer protection from wind, rain, or insects.

Construction Essentials: Tools, Materials, and Safety

Armed with your meticulously planned design, it's time to gather the essential tools and materials for construction.

Essential Tools

  • Measuring tape: Essential for accurate measurements and layout.
  • Level: Ensures the gazebo is level and stable.
  • Circular saw or miter saw: Cuts lumber and other materials to size.
  • Drill: Drives screws and anchors.
  • Screwdriver set: Handles various screw sizes and types.
  • Hammer: For driving nails and securing components.
  • Clamps: Holds materials together during assembly.
  • Safety glasses: Protects your eyes from flying debris.
  • Work gloves: Protects your hands from splinters and tools.

Building Materials

The specific building materials will depend on your chosen design and materials, but common elements include:

  • Lumber (4x4 posts, 2x4 beams, 2x6 joists): Forms the structural framework.
  • Roofing materials (shingles, metal, fabric): Covers the gazebo's roof.
  • Side panels (wood, vinyl, fabric): Enclose the gazebo's sides (optional).
  • Hardware (screws, bolts, anchors): Connects the gazebo's components.
  • Paint or stain: Protects and enhances the appearance of wooden components.
  • Concrete or landscaping blocks: For the foundation of the gazebo.

Safety Considerations

Construction projects inherently involve potential risks. It's essential to prioritize safety throughout the building process. Wear protective gear, including safety glasses, gloves, and sturdy work boots. Follow manufacturer instructions for tools and materials. Never attempt tasks you are unfamiliar with, and seek assistance from a qualified professional when needed.

Constructing Your Gazebo: A Step-by-Step Guide

With your tools, materials, and safety precautions in place, you're ready to begin constructing your cozy grill gazebo.

1. Preparing the Foundation

The foundation is the cornerstone of your gazebo, ensuring stability and longevity. Choose a suitable foundation based on your gazebo's size and weight.

  • Concrete foundation: Offers the most stable and durable option, suitable for larger and heavier gazebos.
  • Landscaping blocks: Provide a stable and cost-effective foundation for smaller gazebos.

Ensure the foundation is level and positioned to accommodate your gazebo's layout.

2. Building the Framework

The framework provides the structure's core support. Start by cutting and assembling the posts that will form the gazebo's corners. Connect the posts with beams to create a rectangular frame, ensuring the corners are square and level. Attach additional beams to form the framework's top section, creating the support for the roof.

3. Adding the Roof

The roof protects you from the elements and defines the gazebo's aesthetic. Choose a roofing material that aligns with your design and budget. Install the roofing material according to the manufacturer's instructions, ensuring proper ventilation and waterproofing.

4. Installing Side Panels

Side panels provide privacy, wind protection, or insect screening, depending on your preferences. Attach the panels to the framework using appropriate hardware, ensuring a secure and aesthetically pleasing fit.

5. Finishing Touches

After completing the core structure, it's time to add the finishing touches that personalize your gazebo.

  • Paint or stain the wood: Enhance the appearance and protect the wood from weather damage.
  • Add lighting: Install lighting fixtures for evening use.
  • Install a ceiling fan: Provide air circulation and comfort on warm days.
  • Add decorative elements: Decorate the gazebo with climbing plants, lanterns, or other personal touches.

Enjoying Your Grill Gazebo: Creating an Outdoor Haven

With your grill gazebo completed, you've created a cozy and inviting space for outdoor meals and gatherings. Embrace the warm evenings, the aroma of grilling food, and the joy of sharing meals under your own personal haven.

Remember to maintain the gazebo regularly to ensure its longevity and beauty. Clean and protect the surfaces, inspect for any damage, and address any issues promptly. With proper care and maintenance, your grill gazebo will continue to be a cherished addition to your backyard for years to come.

Share:

Cold Frame Building Plans for Small Spaces

Cold Frame Building Plans for Small Spaces

Cold Frame Building Plans for Small Spaces

A cold frame is an invaluable tool for gardeners of all levels, providing a protected environment for starting seeds, nurturing seedlings, and extending the growing season. Especially in smaller spaces, where garden real estate is at a premium, a cold frame can be a game-changer. This article delves into the construction of cold frames specifically designed for limited areas, offering detailed plans, materials, and techniques to maximize space and functionality.

Understanding Cold Frames and Their Benefits

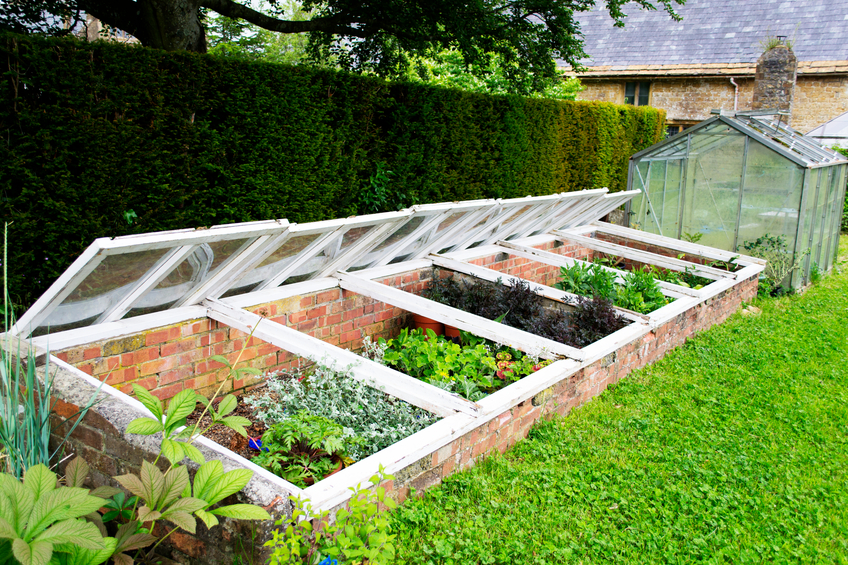
A cold frame essentially acts as a mini-greenhouse, leveraging sunlight and the natural insulation of the earth to create a warmer, more controlled microclimate. Its basic structure typically comprises a clear, transparent cover (often glass or polycarbonate) mounted on a sturdy frame. This design allows sunlight to penetrate, warming the interior, while the enclosed space retains heat and protects delicate plants from harsh weather conditions.

Advantages of Cold Frames

Cold frames offer numerous benefits for small gardens:

  • Extended Growing Season: They allow you to start seeds earlier in the spring and extend the growing season into the fall, even in cooler climates.
  • Protection from Weather: They shield plants from frost, wind, and heavy rain, creating a safe haven for delicate seedlings and young plants.
  • Enhanced Seedling Development: The controlled environment promotes healthy growth, reducing stress and encouraging robust root systems.
  • Space Efficiency: Cold frames can be easily adapted to fit small spaces, making the most of limited garden areas.
  • Lower Costs: They are generally more affordable than traditional greenhouses, especially when building your own.

Choosing the Right Cold Frame Design

When selecting a cold frame design for a small space, several factors are crucial:

Size and Shape

Consider the available space and the types of plants you intend to grow. Smaller, rectangular cold frames are ideal for tight areas, while curved or arched designs can maximize sunlight penetration.

Material and Construction

Wooden frames offer versatility and durability, while metal frames provide greater stability. The covering material can be glass, polycarbonate panels, or even clear plastic sheeting.

Ventilation

Adequate ventilation is essential to prevent overheating. Choose a design with vents or windows that can be adjusted to regulate air flow.

Location and Orientation

Position the cold frame in a sunny spot with good drainage. Orient it so that the longest side faces south to maximize sunlight exposure.

Cold Frame Building Plans for Small Spaces

Here are detailed plans for a simple yet effective cold frame suitable for small gardens:

Materials

  • 2x4 lumber (pressure-treated for longevity)
  • 1/2-inch plywood or exterior-grade OSB
  • Clear polycarbonate panels (4' x 8') or glass sheets
  • Exterior-grade wood screws
  • Weather-resistant wood glue
  • Hardware cloth (optional for added protection)
  • Hinges (for the lid)
  • Handles (for opening and closing the lid)
  • Silicone sealant or weatherstripping
  • Paint or stain (optional for a finished look)

Tools

  • Saw (circular, miter, or hand saw)
  • Drill with various drill bits
  • Screwdriver
  • Tape measure
  • Level
  • Hammer
  • Clamps
  • Safety glasses and gloves

Construction Steps

1. Frame Assembly:

  • Cut the 2x4 lumber to create the frame dimensions. For a small cold frame, consider a base of 3' x 4' and a lid with slightly larger dimensions for overhang.
  • Use wood glue and screws to assemble the frame pieces, forming a rectangle for the base and a similar frame for the lid. Be sure to make the lid frame slightly larger to allow it to sit on top of the base.
  • For added strength, use corner braces or double the 2x4 lumber at the corners.

2. Base Construction:

  • Cut plywood or OSB to fit the inside dimensions of the frame. This will form the base floor.
  • Secure the plywood to the frame using screws and wood glue. You can also add additional supports to prevent sagging if needed.

3. Lid Construction:

  • Cut polycarbonate panels or glass sheets to fit the inside dimensions of the lid frame.
  • Attach the panels or glass to the lid frame using screws or a glazing system, ensuring a secure and weatherproof seal. You may need to use spacers to create an air gap between the panels and the frame for better insulation.
  • Use silicone sealant around the edges of the panels or glass to prevent drafts and water leaks.

4. Hinges and Handles:

  • Attach hinges to the back edge of the lid frame. Choose hinges that are sturdy enough for the weight of the lid.
  • Install handles on the front of the lid for easy opening and closing.

5. Ventilation:

  • For ventilation, incorporate vents or windows into the lid. You can cut holes in the polycarbonate or glass and attach simple wood frames with removable panels or use commercial venting systems.

6. Optional Extras:

  • Hardware Cloth: Add hardware cloth around the base to deter rodents and other pests from accessing the plants.
  • Painting or Staining: Protect the wood frame by painting or staining it with a weather-resistant finish.

Using Your Cold Frame

Once your cold frame is built, here are some tips for using it effectively:

  • Choose the Right Plants: Cold frames are ideal for starting vegetables like lettuce, spinach, broccoli, carrots, and herbs. They can also be used to overwinter delicate perennials.
  • Watering and Ventilation: Regularly check the moisture levels and adjust ventilation to prevent overheating or excessive moisture.
  • Protection from Pests: Monitor for pests and take steps to control them early.
  • Hardening Off: Before transplanting seedlings into the garden, gradually acclimate them to the outdoor environment by slowly increasing exposure to sun and wind.

Conclusion

Building a cold frame for a small space is a relatively simple and affordable project that can significantly enhance your gardening experience. By utilizing the principles of sunlight, insulation, and controlled ventilation, you can create a thriving microclimate that fosters healthy plant growth and extends the growing season. Whether you're a novice gardener or a seasoned green thumb, a cold frame can be a valuable asset for your small garden, allowing you to enjoy a more bountiful and diverse harvest throughout the year.

Share:

How to craft a small wooden clock for your desk

How to craft a small wooden clock for your desk

Crafting a Miniature Wooden Desk Clock: A Step-by-Step Guide

Add a touch of rustic charm and personalized style to your workspace with a handcrafted wooden clock. This project is perfect for beginners, requiring minimal tools and readily available materials. You'll find yourself immersed in the process of creating a unique timepiece that reflects your personal aesthetic.

Gathering Your Supplies

Before diving into the creation process, gather the essential materials and tools. A trip to your local craft store or online retailer will equip you with everything you need.

Materials:

  • A small wooden block (approximately 3-4 inches in diameter)
  • Clock movement kit (including hands, motor, and a battery)
  • Sandpaper (various grits)
  • Wood stain or paint (optional)
  • Wood glue
  • Clear sealant (optional)
  • Pencil
  • Ruler
  • Drill with a small drill bit
  • Screwdriver

Preparing the Wooden Block

Start by prepping the wooden block for your clock face. Use sandpaper to smooth out any rough edges and create a uniform surface. For a polished look, sand with progressively finer grits of sandpaper. If desired, apply wood stain or paint to the block for a personalized touch.

Creating the Clock Face

With the wooden block ready, it's time to design your clock face. You have a few options:

  • Simple Design: Use a pencil and ruler to mark the center of the block and draw simple lines for the hour markings.
  • Detailed Design: Get creative and add intricate designs, numbers, or symbols to personalize your clock face.

If you’re opting for a more detailed design, consider using stencils, carving tools, or even laser engraving for a professional finish.

Installing the Clock Movement

Once your clock face is complete, it's time to install the clock movement.

  1. Centering the Movement: Carefully position the clock movement in the center of the wooden block, ensuring the hands are aligned with the marked hour markings.
  2. Drilling Pilot Holes: Use a drill and a small drill bit to create pilot holes for the screws that will secure the movement to the wooden block.
  3. Securing the Movement: Secure the clock movement to the block using the screws provided in the kit.
  4. Adding the Hands: Attach the clock hands to the movement according to the instructions included in the kit.

Finishing Touches

Your clock is nearly complete! Give it a final polish by applying a clear sealant to protect the wood and enhance its natural beauty. If you're feeling adventurous, add a decorative element like a small knob to the back of the clock for easy winding.

Displaying Your Creation

Once the sealant dries, you can proudly display your handcrafted wooden clock on your desk, bookshelf, or any other prominent spot in your home. Your unique timepiece will not only tell time but also add a touch of warmth and personality to your space.

Share:

Downloadable PDF Plans for an Eco-Friendly Squirrel Box

Downloadable PDF Plans for an Eco-Friendly Squirrel Box

Build a Squirrel Box: Free Downloadable PDF Plans

Building a squirrel box is an engaging and rewarding project, offering a chance to provide shelter for these playful creatures while also adding a touch of nature to your backyard. This article provides you with free, downloadable PDF plans to create a squirrel box that is both inviting to squirrels and environmentally friendly.

Why Build a Squirrel Box?

Squirrels are essential to our ecosystem, playing crucial roles in seed dispersal and forest regeneration. By building a squirrel box, you can provide a safe and secure haven for these furry friends, especially during harsh weather conditions.

Benefits of Building a Squirrel Box

  • Offers shelter and protection from predators.
  • Provides a nesting site for raising young squirrels.
  • Encourages biodiversity and supports a healthy ecosystem.
  • Offers opportunities for observation and connection with nature.

Downloadable PDF Plans: Eco-Friendly Squirrel Box

Our detailed PDF plans provide step-by-step instructions and diagrams to guide you through building an eco-friendly squirrel box. We emphasize using sustainable materials and construction techniques, ensuring a safe and inviting home for your furry tenants.

Plan Features:

  • Material List: Includes specific types and quantities of eco-friendly materials, encouraging the use of recycled or reclaimed wood.
  • Detailed Diagrams: Provides clear visuals of the squirrel box's construction, making the building process straightforward.
  • Step-by-Step Instructions: Offers easy-to-follow instructions, ensuring a successful project for all skill levels.
  • Eco-Friendly Tips: Includes suggestions for minimizing your environmental footprint during construction.

Building Your Eco-Friendly Squirrel Box

Follow the detailed PDF plans to assemble your squirrel box. Take your time, ensure accurate measurements, and choose high-quality materials for longevity. Here are some helpful tips:

Tips for Building a Squirrel Box

  • Location: Choose a site that offers protection from the elements and direct sunlight. A tree with a large, sturdy branch is ideal.
  • Placement: Mount the squirrel box at least 8-10 feet above the ground to deter predators.
  • Maintenance: Clean the box regularly, especially in the spring, to remove debris and encourage healthy nesting.
  • Enjoy the Squirrels: Once your squirrel box is built and in place, enjoy observing these playful creatures as they come and go.

Building an eco-friendly squirrel box is a rewarding experience that will not only benefit the local squirrel population but also encourage a deeper appreciation for nature. Download your free PDF plans today and begin building your own sanctuary for these furry friends!

Share:

Step-by-step diy guide to crafting a wooden clock

Step-by-step diy guide to crafting a wooden clock

Building a Wooden Clock: A DIY Guide for Beginners

Hey there, crafty folks! Are you ready to add a touch of rustic charm to your home décor? Building a wooden clock is a fun and rewarding DIY project that allows you to express your creativity while crafting a practical and beautiful piece for your living space. This guide will walk you through the entire process, from gathering materials to finishing touches, making it accessible even for those with limited woodworking experience. So grab your tools, put on your favorite tunes, and let's get started!

Gathering Your Materials

Before we dive into the exciting part of building, let's ensure we have all the necessary materials. You'll need:

  • Wood: Choose your favorite wood for the clock face. Pine, oak, and plywood are all great options. Aim for a piece that's at least 1/2 inch thick and has a smooth surface.
  • Clock Movement: This is the heart of your clock. It'll include the motor, hands, and a mechanism for setting the time. You can find various clock movements online or at craft stores.
  • Wood Stain or Paint: Choose a finish that complements your wood and your home's style. You can keep it natural with a clear stain or add a splash of color with paint.
  • Sandpaper: You'll need different grit sandpaper for sanding the wood before and after staining or painting.
  • Clock Hands: These come in various styles and sizes, so choose ones that match your clock face and personal taste.
  • Clock Numbers or Roman Numerals: Opt for a set of numbers or numerals that suit your design aesthetic. They can be crafted from wood, metal, or even painted onto the clock face.
  • Wood Glue: For securely attaching the clock movement and numbers to the wood.
  • Screws: To secure the hands to the clock movement.
  • Drill: For drilling pilot holes for the screws.
  • Measuring Tape: To ensure accurate measurements for cutting and positioning.
  • Pencil or Marker: For marking the wood for cutting and placing the clock movement.
  • Saw (Optional): If you need to cut the wood to size. You can use a jigsaw, table saw, or hand saw.
  • Safety Glasses: Always wear safety glasses when working with power tools.

Preparing Your Clock Face

Now that we've gathered our supplies, it's time to prepare the clock face. Start by sanding the wood surface thoroughly to ensure it's smooth and free of any imperfections.

Step 1: Shaping Your Clock Face

If you're using a pre-cut piece of wood, you're good to go! If you need to cut the wood to size, use your saw to create a round, square, or rectangular shape, depending on your preferred clock design. Be sure to measure carefully and mark the wood before cutting.

Step 2: Sanding

Start with coarser grit sandpaper (around 80 grit) to smooth out rough spots. Then, gradually work your way up to finer grit sandpaper (around 220 grit) for a smooth, polished finish.

Step 3: Staining or Painting

Let your creativity shine! Apply your chosen stain or paint to the clock face. Be sure to follow the manufacturer's instructions for drying times and application.

Assembling Your Clock

Step 1: Positioning the Clock Movement

Measure and mark the center of your clock face. Use a pencil to outline the area where the clock movement will be positioned.

Step 2: Attaching the Clock Movement

Carefully apply wood glue to the back of the clock movement. Center it over the marked area on the clock face and press down firmly for several seconds.

Step 3: Securing the Hands

With the clock movement attached, it's time for the hands! Choose the hour, minute, and second hands that best match your design. Insert each hand onto the designated shaft on the clock movement and tighten the screws to hold them in place.

Step 4: Adding Numbers or Roman Numerals

Time to add those decorative numbers! If you're using pre-made numbers, use a pencil to mark their positions around the clock face. You can use a compass to make sure the numbers are evenly spaced. Apply wood glue to the back of each number and place them on the clock face according to your markings. Once they're in place, let the glue dry completely.

Step 5: Installing the Battery

The final step before testing your masterpiece! Insert the battery into the clock movement according to the manufacturer's instructions.

Finishing Touches and Hanging Your Clock

You've created a beautiful clock! Now it's time to add the final touches and hang it proudly in your home.

Step 1: Adding a Protective Coating (Optional)

For extra protection, you can apply a clear sealant or varnish to the clock face after the stain or paint has dried completely. This will help protect the finish from scratches and spills.

Step 2: Hanging Your Clock

Choose a spot on your wall for your clock and mark the location where you want to hang it. Using a drill and a suitable screw, carefully install a hook or bracket on the wall. Then, attach the clock to the hook or bracket.

Tips for Success

Here are some additional tips to help you create a stunning wooden clock:

  • Choose the right wood: Opt for a wood that complements your design and the overall style of your home.
  • Practice your cuts: If you're not familiar with using a saw, practice on a scrap piece of wood before cutting your clock face.
  • Sanding is crucial: Don't skip sanding! A smooth surface will allow the stain or paint to adhere properly.
  • Let everything dry: Be patient! Allow the wood stain, paint, and glue to dry completely before moving on to the next step.
  • Don't be afraid to personalize: Add your own unique touches, such as decorative embellishments, stencils, or a personal message.

Congratulations, my friend! You've successfully crafted a beautiful and functional wooden clock. Enjoy the satisfaction of knowing that you've created something special with your own two hands. And don't forget to show off your creation! It's a perfect conversation starter for your home or a thoughtful gift for someone special.

Share:

How to build a handmade gun cabinet for a luxurious display

How to build a handmade gun cabinet for a luxurious display

Building a Luxurious Handmade Gun Cabinet for Display

A gun cabinet is more than just a storage solution; it's an opportunity to showcase your firearms in a manner that reflects your passion and taste. A handmade gun cabinet, crafted with meticulous attention to detail, elevates the display to a level of elegance and sophistication, transforming your collection into a focal point of your home.

This comprehensive guide will lead you through the process of building a luxurious handmade gun cabinet, covering everything from planning and materials to construction and finishing. With careful planning and dedication, you can create a masterpiece that not only safeguards your valuable firearms but also enhances your home décor.

Planning Your Gun Cabinet

1. Determine Size and Dimensions

The first step is to assess your collection and determine the size and dimensions of your gun cabinet. Consider the number and types of firearms you wish to display, the available space in your home, and the overall aesthetic you envision.

2. Choose a Style

The style of your gun cabinet will set the tone for the entire display. Consider traditional, modern, rustic, or contemporary styles. Research examples of gun cabinets that resonate with you and gather inspiration from various sources.

3. Select Materials

The choice of materials will significantly impact the look and feel of your gun cabinet. Popular options include:

  • Hardwoods: Walnut, cherry, mahogany, oak, and maple offer strength, durability, and beautiful grain patterns.
  • Softwoods: Pine and cedar provide a lighter, more rustic aesthetic.
  • Metal: Steel or aluminum can create a modern, industrial look.
  • Glass: Tempered glass can be used for display shelves and doors, offering a sleek, contemporary touch.

4. Design the Interior

The interior of your gun cabinet should be designed to accommodate your collection safely and securely. Consider features such as:

  • Adjustable shelves: Provide flexibility to display firearms of different sizes.
  • Locking drawers: For storing accessories, ammunition, or valuable items.
  • Gun racks: Ensure secure and organized storage for firearms.
  • Humidifier: Maintain optimal humidity levels to protect your firearms.

Construction and Assembly

1. Build the Cabinet Base

Begin by constructing a sturdy base to support the weight of the cabinet. Use mortise-and-tenon joints for strong and durable connections. Carefully measure and cut the base pieces, ensuring they are square and level.

2. Assemble the Sides and Back

Cut the sides and back panels to size and assemble them to the base. Use glue and screws for a secure bond. Create dado joints to accommodate the shelves and drawers.

3. Install Shelves and Drawers

Install the shelves and drawers using dovetail joints for a strong and elegant connection. Use high-quality drawer slides for smooth operation.

4. Assemble the Doors

Craft the doors using mortise-and-tenon joints or similar construction techniques. Use high-quality hinges and a sturdy locking mechanism for security.

Finishing Touches

1. Sanding and Staining

Thoroughly sand the cabinet to achieve a smooth, even surface. Apply a stain to enhance the natural beauty of the wood. Choose a stain color that complements your home décor and the style of your gun cabinet.

2. Applying a Protective Finish

Seal the wood with a protective finish, such as polyurethane or lacquer, to enhance durability and prevent scratches and moisture damage. Multiple coats will provide a superior finish.

3. Adding Details

Enhance the luxurious appeal of your gun cabinet with custom details. Consider adding:

  • Intricate carvings: Create elegant accents that reflect your personal taste.
  • Brass hardware: Adds a touch of sophistication to the cabinet's appearance.
  • Custom-made nameplate: Personalize the cabinet with your name or initials.

Tips for Displaying Your Firearms

Once your gun cabinet is complete, it's time to showcase your collection with style and safety.

1. Create a Focal Point

Arrange your firearms in a way that highlights their unique features and creates a visually pleasing display.

2. Use Lighting to Your Advantage

Install adequate lighting to illuminate your firearms and enhance their appearance.

3. Incorporate Decorative Elements

Enhance your display with decorative elements, such as antique firearms, swords, or historical memorabilia, to create a thematic collection.

Safety and Security

Always prioritize safety and security when displaying firearms.

1. Secure the Cabinet

Use heavy-duty locks and secure the cabinet to the wall or floor to prevent theft.

2. Store Firearms Safely

Store firearms in a secure manner, using gun racks or other storage methods that prevent accidental discharge.

3. Follow Local Regulations

Ensure that your display complies with all local laws and regulations regarding firearms storage and display.

Conclusion

Building a handmade gun cabinet is a rewarding endeavor that allows you to create a luxurious display for your valuable firearms. With careful planning, skilled craftsmanship, and an eye for detail, you can craft a masterpiece that reflects your passion and elevates the aesthetic of your home. Remember to prioritize safety and security throughout the process, and enjoy the satisfaction of showcasing your collection in a unique and elegant manner.

Share:

How to design and build an in-wall gun cabinet for concealed storage

How to design and build an in-wall gun cabinet for concealed storage

Building an In-Wall Gun Cabinet: A Guide to Concealed Storage

Hey there, gun enthusiasts! You know the drill: safety first. But what about security? Sometimes, a traditional gun safe just doesn't cut it. Maybe you're renting and can't install a heavy safe, or you want something more discreet. That's where a hidden in-wall gun cabinet comes in handy. It's a clever way to keep your firearms secure while blending seamlessly into your home decor.

Planning Your In-Wall Gun Cabinet

Building an in-wall gun cabinet is a serious undertaking, so don't jump in without careful planning. Let's break down the process:

Location, Location, Location

Think strategically. You want a spot that's easily accessible to you, but not obvious to visitors. Consider these factors:

  • Wall thickness: You need a wall thick enough to accommodate the cabinet, plus any framing and insulation.
  • Accessibility: Make sure you can comfortably reach the cabinet and open it. You don't want to be contorting yourself in awkward positions.
  • Concealment: Choose a spot that won't draw attention. Behind a bookshelf, a picture frame, or even within a closet are good options.
  • Choosing Materials

    Quality matters! You're dealing with firearms, so safety and durability are key. Here's what you'll need:

  • Wood: Solid hardwood, like oak or maple, is ideal. It's strong, resistant to warping, and can be stained to match your decor.
  • Metal: Consider using steel or aluminum for extra security. These materials can be incorporated for the cabinet's frame, hinges, and lock mechanism.
  • Fasteners: Use heavy-duty screws and bolts designed for structural applications. Don't skimp here!
  • Door hinges: Invest in concealed hinges, as these offer better security. Choose a sturdy, reliable model.
  • Lock mechanism: Consider a high-quality lock with a keyhole that's hidden or covered. You can also explore electronic locks for added security and convenience.
  • Drawing Up Plans

    Now, it's time to get technical. Before you start cutting wood, sketch out detailed plans:

  • Measure twice, cut once: Take precise measurements of the space you've chosen. Factor in the thickness of the wall and any framing.
  • Determine dimensions: Sketch out the cabinet's dimensions, including depth, width, and height. Remember, it should be large enough to hold your firearms comfortably and securely.
  • Decide on shelf configuration: Plan where you'll place shelves to hold your firearms and any accessories. Consider using adjustable shelves for greater versatility.
  • Mark out the door opening: Carefully mark where you'll cut the door opening. This should be done on the wall itself, using a level and a pencil.
  • Building the Cabinet

    Ready to get your hands dirty? Here's a step-by-step breakdown:

    Framing the Cabinet

    Start by constructing the cabinet's frame using the wood you've chosen. Here's a general outline:

  • Cut the pieces: Using your plans, cut the wood to size for the cabinet's sides, top, bottom, and back.
  • Assemble the frame: Join the pieces together using wood glue and screws, ensuring tight and secure connections. If using metal, you'll likely be using screws, rivets, or welding for joining.
  • Add support: Include extra support in areas that will be under heavy stress, such as where the door hinge will be attached.
  • Installing the Door

    The door is what makes your cabinet hidden, so pay close attention to this step:

  • Cut the door opening: Once the frame is complete, carefully cut the door opening in the wall using a jigsaw. Be sure to use safety glasses and a dust mask.
  • Attach hinges: Install the concealed hinges to the door and the cabinet frame. Make sure they're aligned perfectly for smooth operation.
  • Add the door: Carefully hang the door on the hinges. Ensure it closes securely and flush against the wall. You may need to adjust the hinges slightly.
  • Adding Shelves

    Shelves keep your firearms organized and secure:

  • Measure and cut shelves: Cut shelves to the desired length and width, based on your plans. If using adjustable shelves, make sure you have the necessary brackets or rails in place.
  • Secure the shelves: Attach the shelves to the cabinet walls using sturdy brackets or screws. Make sure they're installed at a height that's safe and convenient for accessing your firearms.
  • Finishing Touches

    Now, it's time to make your cabinet look good and function smoothly:

  • Paint or stain: Paint or stain the cabinet to match your existing decor. You can use a high-quality finish to protect the wood and make it durable.
  • Install the lock: Install the chosen lock mechanism, ensuring that the keyhole is well-hidden or protected.
  • Add a handle or latch: If you want to make the cabinet more discreet, you can add a hidden handle or latch mechanism. You can even use a magnetic latch for seamless operation.
  • Clean and dry: Once everything is in place, give the cabinet a thorough cleaning and let it dry completely before storing your firearms.
  • Safety Precautions

    Building a gun cabinet requires safety first. Here's what you need to keep in mind:

  • Use proper tools and equipment: Use the right tools for the job, ensuring they're in good working order. Always wear safety glasses, a dust mask, and gloves when working with power tools.
  • Follow instructions carefully: Read and understand the instructions for all tools and materials you're using. Take your time and don't rush the process.
  • Double-check measurements: Precise measurements are crucial. Double-check everything before cutting or drilling. A mistake at this stage can have serious consequences.
  • Use caution when handling firearms: Always treat firearms with respect and practice proper safety procedures. Never leave a loaded firearm unattended. Store firearms securely in the cabinet when not in use.
  • Conclusion

    Building an in-wall gun cabinet is a great way to keep your firearms safe and secure while blending seamlessly into your home. It takes planning, precision, and a healthy dose of caution, but the end result is a custom-made storage solution that offers peace of mind and security.

    Remember, safety should always be your top priority. Practice responsible gun ownership and store your firearms securely in a well-built and reliable cabinet.

    Share:

    How to build a wooden gun box with a sliding drawer

    How to build a wooden gun box with a sliding drawer

    Building a Wooden Gun Box with a Sliding Drawer

    A wooden gun box with a sliding drawer provides a secure and stylish storage solution for your firearms. This project requires basic woodworking skills and readily available materials. This article will guide you through the construction process step-by-step, ensuring you create a high-quality and functional gun box.

    Materials and Tools

    Before embarking on this project, ensure you have the necessary materials and tools. Gather the following:

    Materials

    • Wood: Choose a sturdy hardwood like oak, maple, or walnut for the box and drawer. You will need approximately 12 board feet of lumber.
    • Plywood: ½ inch plywood for the drawer bottom and back.
    • Wood glue: A high-quality, water-resistant wood glue.
    • Wood screws: 1 ¼ inch and 2 inch screws for assembly.
    • Finishing nails: 1 ½ inch finishing nails for attaching the drawer face.
    • Drawer slides: Heavy-duty, full-extension drawer slides.
    • Wood stain or paint: For finishing the box.
    • Clear polyurethane finish: For protecting the wood.
    • Hardware: A lock, hinges, and a handle for the box.

    Tools

    • Table saw
    • Circular saw
    • Miter saw
    • Drill press or handheld drill
    • Screwdriver
    • Clamps
    • Sandpaper
    • Measuring tape
    • Pencil
    • Level
    • Safety glasses
    • Dust mask
    • Ear protection

    Construction Steps

    1. Cut the Box Pieces

    Begin by cutting the wood for the box. You will need the following pieces:

    • Two side pieces: Cut to the desired length and height of the box.
    • Two end pieces: Cut to the desired width and height of the box.
    • One bottom piece: Cut to the length and width of the box.
    • One top piece: Cut to the length and width of the box. This will be the lid of the box.

    Use a table saw or miter saw for accurate cuts. Ensure all pieces are square and smooth.

    2. Assemble the Box

    Assemble the box using a combination of wood glue and screws. Begin by attaching the side pieces to the end pieces. Apply wood glue to the edges and secure with screws. Repeat for the other side.

    Next, attach the bottom piece to the assembled frame. Use glue and screws to secure it. You may need clamps to hold the pieces together while the glue dries.

    3. Cut and Assemble the Drawer

    Next, create the drawer. Cut the following pieces:

    • Two side pieces: Cut to the desired length and height of the drawer.
    • Two end pieces: Cut to the desired width and height of the drawer.
    • One bottom piece: Cut from the plywood to the length and width of the drawer.
    • One back piece: Cut from the plywood to the length and height of the drawer.

    Assemble the drawer using the same process as the box. Use glue and screws to join the pieces. Allow the glue to dry completely before moving on.

    4. Attach Drawer Slides

    Attach the drawer slides to the sides of the drawer and the interior sides of the box. Follow the manufacturer’s instructions for proper installation. Ensure the slides are level and aligned.

    5. Cut and Attach the Drawer Face

    Cut a piece of wood for the front of the drawer. This piece should be slightly longer than the width of the drawer to create an overhang.

    Attach the drawer face using finishing nails. Use a nail gun or hammer and nail set for a clean and secure finish.

    6. Cut and Attach the Lid

    Cut a piece of wood for the lid of the box. This piece should be slightly larger than the top of the box to create an overhang.

    Attach the lid to the box using hinges. Use a drill and screws to secure the hinges to the lid and box. Ensure the lid opens and closes smoothly.

    7. Sand and Finish the Gun Box

    Sand the entire box, drawer, and lid with progressively finer grits of sandpaper. Start with 80 grit sandpaper and finish with 220 grit. This will create a smooth surface for finishing.

    Apply your chosen wood stain or paint to the box. Allow the finish to dry completely before applying a clear polyurethane finish. Apply several coats of polyurethane for a durable and protective finish.

    8. Install Hardware

    Finally, install the lock, hinges, and handle for the box. Follow the manufacturer’s instructions for installation. Ensure all hardware is securely attached.

    Safety Considerations

    When working with power tools and sharp edges, safety should always be a top priority. Wear safety glasses, a dust mask, and ear protection at all times. Follow the manufacturer’s instructions for all tools and equipment. Be cautious when handling sharp objects and avoid any distractions while working.

    Tips for Building a High-Quality Gun Box

    • Choose high-quality materials: Using durable hardwood for the box and drawer will ensure longevity and durability. Avoid using softwoods that are prone to scratches and dents.
    • Use a quality wood glue: A high-quality wood glue will create a strong bond between the pieces. Choose a water-resistant glue for added durability.
    • Pre-drill holes for screws: Pre-drilling holes before driving screws will prevent splitting the wood.
    • Sand thoroughly: Thorough sanding ensures a smooth and even finish. Use progressively finer grits of sandpaper for a professional look.
    • Apply multiple coats of finish: Applying multiple coats of polyurethane will create a durable and protective finish that will resist scratches and water damage.
    • Use a lock for security: A lock will provide added security for your firearms.

    Conclusion

    Building a wooden gun box with a sliding drawer is a rewarding project that provides you with a customized storage solution for your firearms. By following these detailed steps and safety precautions, you can create a high-quality and functional gun box that will protect your firearms and enhance your home décor.

    Share:

    How to create a wooden gun cabinet with secure and stylish features

    How to create a wooden gun cabinet with secure and stylish features

    Building a Gun Cabinet: Security Meets Style

    Hey there, gun enthusiasts! Whether you're a seasoned collector or just starting out, safeguarding your firearms is a top priority. A good gun cabinet not only keeps your weapons secure but also adds a touch of sophistication to your home. So, let's dive into the world of building a wooden gun cabinet that's both secure and stylish!

    Planning Your Gun Cabinet: The Blueprint

    Before you grab your tools, let's plan this out. The size and style of your gun cabinet should reflect your needs and preferences. Ask yourself these questions:

    1. How Many Firearms?

    Consider the number of guns you own and any future additions. A good rule of thumb is to leave a little extra space for expansion.

    2. Gun Lengths and Types?

    Measure the longest firearm you own to determine the necessary interior height. Factor in room for scopes and other accessories.

    3. What Style Are You Going For?

    Traditional, modern, rustic, or something else entirely? Pick a style that complements your home décor. Look at online resources and magazines for inspiration!

    4. Wood Choice: Oak, Cherry, Walnut?

    Select a wood that aligns with your style and budget. Oak is durable and classic, cherry has a rich red hue, while walnut brings a dark, elegant look. Don't forget to think about how you want to stain or finish your wood.

    The Security Foundation: Locking Mechanisms

    Security is paramount! Here's where your gun cabinet steps up its game.

    1. Solid Construction: More Than Just Pretty

    Start with sturdy, solid wood construction. Avoid using thin, flimsy materials. Thicker wood means more protection and a longer-lasting cabinet.

    2. Locking System: Your First Line of Defense

    This is where you really need to invest. A good locking system is a must-have. Consider these options:

    • Keyed Locks: Reliable and easy to use. Choose high-quality locks with multiple locking points for maximum security.
    • Combination Locks: Eliminate the need for keys. Look for dial-type locks with hardened steel mechanisms for extra resistance against tampering.
    • Electronic Locks: Sleek and modern, these often feature fingerprint scanners or keypad entry. Just make sure they're well-built and use reliable batteries!

    3. Hinges and Hardware: The Silent Guardians

    Don't overlook these details! Choose strong, concealed hinges to prevent prying. Look for durable, heavy-duty hardware like heavy-duty hasps and locking plates.

    Creating a Stylish Cabinet: The Finishing Touches

    Now that you have the security foundation, let's add those stylish elements to make your gun cabinet a true statement piece.

    1. Finish It Right: Stains and Finishes

    Think about what best complements your wood and decor. Here are some popular options:

    • Stains: Add color and depth to your wood. Choose from rich browns, warm reds, or classic blacks.
    • Finishes: Protect your wood and enhance its natural beauty. Consider polyurethane, varnish, or wax to create a durable and elegant finish.

    2. Hardware: The Finishing Touch

    Adding tasteful hardware can elevate the look of your gun cabinet. Consider:

    • Knobs and Handles: Choose styles that complement your cabinet's design. Metal knobs, leather pulls, or even antique-style handles can add a touch of personality.
    • Decorative Molding: Add some visual interest with intricate moldings around the doors, edges, or shelves. Wood carvings can also enhance the design.

    3. Lighting: Showcase Your Collection

    Proper lighting can highlight your collection and make your gun cabinet a focal point. Install:

    • Internal Lights: LED strips or small bulbs can provide a soft glow inside the cabinet.
    • Accent Lighting: Highlight the cabinet with a decorative wall sconce or track lighting above.

    Building Your Gun Cabinet: Let's Get Started

    You've got your plan, so let's bring this to life! Here's a basic framework for building your gun cabinet, but remember: this is just a guide. You'll need to tailor it to your specific design and preferences.

    1. Cutting and Assembly

    1. Cut your wood to size for the cabinet body, shelves, doors, and other components.
    2. Assemble the cabinet frame using glue, screws, and dowels for added strength.
    3. Attach the doors and ensure proper fit and alignment.

    2. Installation

    1. Add shelves, dividers, or any internal components.
    2. Install your locking mechanism with care, ensuring it's secure and functioning smoothly.
    3. Install the hardware: knobs, handles, and hinges.

    3. Finishing Touches

    1. Sand your cabinet thoroughly for a smooth surface.
    2. Apply stain and let it dry completely.
    3. Finish with your chosen protective coating (polyurethane, varnish, or wax), applying multiple coats for durability.

    Safety First: Always Prioritize Security

    It's important to remember: a gun cabinet is meant to protect your firearms and keep them out of unauthorized hands. Never skimp on security measures. Use high-quality locks, and always practice safe gun handling and storage practices.

    Conclusion: A Secure and Stylish Home for Your Guns

    Building a wooden gun cabinet can be a rewarding project. You'll have a custom-designed piece that not only keeps your firearms secure but also adds style and elegance to your home. Remember to prioritize security, be creative with your design, and enjoy the process! You'll have a piece of furniture you can be proud of and know your guns are protected.

    Share:

    How to design a handmade gun cabinet with functional storage

    How to design a handmade gun cabinet with functional storage

    Designing a Functional Handmade Gun Cabinet

    Owning firearms comes with the responsibility of safe and secure storage. A well-designed gun cabinet not only protects your weapons but also enhances the aesthetic appeal of your home. This article will guide you through the process of designing and building a functional handmade gun cabinet, incorporating smart storage solutions for maximum efficiency and security.

    Planning and Design Considerations

    Before embarking on your project, careful planning is essential. Consider the following factors:

    Size and Dimensions

    The cabinet's size should accommodate your firearm collection comfortably. Measure your firearms and accessories to determine the required length, width, and height. Allow adequate space for future additions.

    Material Selection

    Choose a durable material that can withstand the weight and stress of firearm storage. Common options include:

    • Solid Wood: Offers excellent strength, durability, and a classic aesthetic.
    • Plywood: Provides stability and affordability. It can be painted or stained to match your décor.
    • Metal: Durable and fire-resistant, but may require specialized tools and welding expertise.

    Security Features

    Prioritize security to prevent unauthorized access. Consider:

    • Locking Mechanism: Choose a high-quality, tamper-resistant lock with a robust deadbolt.
    • Door Hinges: Opt for concealed, reinforced hinges to deter forced entry.
    • Steel Plate: Incorporate a steel plate around the lock area for added protection against drilling attempts.

    Storage Organization

    A well-organized cabinet ensures efficient storage and easy access. Think about:

    • Shelves: Adjustable shelves allow you to customize the space for various firearm sizes and accessories.
    • Drawers: Offer secure storage for ammunition, cleaning supplies, and other sensitive items.
    • Hangers: Hang firearms on dedicated hangers to prevent scratches and minimize stacking.
    • Cable Locks: Utilize cable locks to secure firearms to the shelves or hangers, adding an extra layer of protection.

    Construction Process

    Once you have your design finalized, follow these steps for construction:

    Framing the Cabinet

    1. Cut and assemble the cabinet's frame using your chosen material. Ensure all joints are secure with glue and screws or dowels.

    2. Consider adding additional reinforcement around the lock area and hinges for enhanced security.

    Building the Shelves and Drawers

    1. Cut and assemble shelves and drawers using the same material as the frame or a different material for contrast.

    2. Install drawer slides and ensure they are properly aligned. Consider using soft-close slides for smooth operation.

    Installing the Door and Locking Mechanism

    1. Hang the door using the pre-installed hinges. Ensure it closes securely and smoothly.

    2. Install the locking mechanism, including the strike plate, using the provided instructions.

    3. Test the lock's functionality and ensure it operates smoothly.

    Finishing Touches

    1. Apply a protective finish, such as paint, stain, or varnish, to the cabinet to enhance its appearance and provide protection against moisture and scratches.

    2. Add decorative elements like molding or trim to create a more customized look.

    Safety and Maintenance

    After construction, ensure your handmade gun cabinet meets safety standards and maintain it properly for optimal performance:

    Fire Safety

    Store the cabinet away from heat sources and install a fire-resistant liner or consider a fireproof safe for added protection.

    Moisture Control

    Prevent moisture buildup by storing the cabinet in a dry environment and maintaining good ventilation. Moisture can damage the wood and affect the firearm's condition.

    Regular Maintenance

    Periodically inspect the cabinet for loose screws, worn-out hinges, or damage to the finish. Lubricate hinges and locks to maintain smooth operation.

    Additional Considerations

    Beyond the essential aspects, consider these additional factors for an even more functional and aesthetically pleasing cabinet:

    • Interior Lighting: Install a small LED light inside the cabinet for easy viewing in low-light conditions.
    • Humidity Control: If you live in a humid environment, consider incorporating a small dehumidifier inside the cabinet to protect your firearms from corrosion.
    • Security Alarm System: Integrate a security alarm system with the cabinet to notify you of any unauthorized access.
    • Customization: Tailor the design to your preferences and match the cabinet's style with your home's interior design.

    Conclusion

    Building a handmade gun cabinet can be a rewarding project, allowing you to create a safe and personalized storage solution for your firearms. By carefully planning, selecting the right materials, and following the construction steps outlined above, you can ensure your cabinet meets your specific needs and enhances the safety and organization of your gun collection.

    Remember to prioritize security, incorporate smart storage features, and prioritize proper maintenance to ensure the longevity and effectiveness of your handmade gun cabinet.

    Share:

    10 woodworking tips for building the perfect magic box

    10 woodworking tips for building the perfect magic box

    Alright, you want to build a magic box, huh? That's awesome! I love the idea of bringing a little bit of wonder and mystery into the world. But before you start sawing and gluing, let's talk about some tips to make sure your magic box is truly special. Think of this as your secret guide to woodworking wizardry!

    1. Choose Your Wood Wisely - The Foundation of Magic

    First things first: the wood. This isn't just about looks, it's about the soul of your box. Imagine what kind of magic you want to conjure. Want something dark and mysterious? Ebony or walnut will do the trick. Something lighter and ethereal? Maple or birch might be your best bet.

    And don't underestimate the power of a good wood finish! A rich, dark stain can add an air of antiquity, while a light, natural oil finish lets the wood's beauty shine through.

    2. Secret Compartments - Where the Magic Hides

    Every magic box needs a secret compartment! Think about the tricks you want to perform and what you need to hide. Do you need a hidden space for a tiny puppet to pop out? Maybe a compartment for a deck of cards to disappear? Or perhaps a secret drawer for a magic wand to appear?

    Now, there are all kinds of ways to create these compartments. You can use false bottoms, hidden panels, even magnetic catches. Get creative and think outside the box! (Pun intended, of course!)

    3. The Power of Hinges - Opening Up the Mystery

    You want hinges that are strong and smooth, so your magic box opens and closes seamlessly. Avoid those cheap, flimsy hinges that can easily break. Instead, look for sturdy hinges made of brass or steel. And don't forget about the finishing touch: add some decorative hinges for that extra bit of whimsy.

    4. A Lock and Key - The Gatekeeper of Secrets

    Now, a magic box isn't truly magical without a lock and key. Think about it: what's more intriguing than a secret you can't easily unlock?

    Again, choose your lock wisely. It should be sturdy enough to keep your secrets safe but simple enough to operate with a flourish. Maybe you even want a lock with a hidden release mechanism, adding another layer of mystery.

    5. The Art of Detail - Adding the Spark of Magic

    A magic box is all about the details. Think about the little things that can make your box truly special. A beautifully carved handle, maybe some intricate inlays, or even a hidden inscription on the inside.

    Remember, every detail adds to the story, so don't be afraid to get creative. Adding a unique touch like a tiny clockwork gear or a glowing gem could make your box truly unforgettable.

    6. A Touch of Illusion - Tricking the Eye

    Here's where you get to play with perspective and trick the eye. Think about how you can use mirrors, hidden lights, or even different materials to create illusions. Maybe you want to make an object appear to float in mid-air, or disappear completely.

    Remember, the more surprising and unexpected your tricks are, the more magical your box will seem.

    7. Don't Forget the Showmanship - It's All in the Presentation

    A magic box is only as magical as the person who uses it. Practice your tricks and learn to perform them with confidence and flair. A theatrical presentation can transform a simple box into a captivating spectacle.

    Remember, your personality and charisma are your secret weapons. Don't be afraid to add your own unique touch to the show.

    8. Inspiration is Everywhere - Look for Magic in the World

    Want some ideas for your magic box? Look around you! The world is full of magic, you just need to know where to look. Look at nature: the intricate patterns on a butterfly's wings, the swirling shapes of a cloud. Look at architecture: the hidden details in a cathedral, the whimsical curves of a carousel.

    All these things can inspire your own unique design.

    9. The Power of Practice - Make Your Magic Flow

    Building a magic box is only the beginning. You need to practice your tricks, refining your movements and timing. The more you practice, the smoother and more believable your magic will become.

    Don't be afraid to experiment, to make mistakes, and to learn from them. That's how you truly master the craft of magic.

    10. Most Importantly - Have Fun!

    Building a magic box is a journey of creativity and wonder. Enjoy the process, embrace the challenges, and let your imagination run wild. Remember, magic is about bringing joy and amazement to others. So have fun, be creative, and share your magic with the world!

    Now, go forth and build your magic box! The world needs more wonder and a little bit of magic, and you're the perfect person to bring it to life. And remember, if you need any more tips, feel free to ask! I'm always happy to help fellow magic makers. ✨

    Share:

    How to build a secure wooden gun case for safety

    How to build a secure wooden gun case for safety

    Alright, so you want to build a gun safe, but you're thinking, "I don't want a big metal monstrosity taking up half my garage." I get it. Sometimes, you just need a smaller, more discreet way to store your firearms. That's where a wooden gun case comes in!

    Now, building a wooden gun case might seem intimidating, but trust me, it's totally doable. You don't need to be a master carpenter, just a little handy with tools and a bit of patience.

    Let's get started, shall we?

    1. The Plan:

    First things first, we need a plan. You gotta figure out what you want to store, how many guns you'll be keeping safe, and the overall dimensions of your case.

    Size: Think about the longest gun you'll be storing and add a few extra inches for padding and wiggle room. You also want to make sure the case is wide enough to accommodate the largest gun you'll be storing.
    Design: You can go super simple with a basic box design or get fancy with compartments and dividers. The key is to make it functional for your needs.
    Materials: The strength of your case depends on the wood you choose. Hardwoods like oak or maple are great options, but they can be pricey. You could go for a less expensive wood like pine or plywood and beef it up with extra layers or thicker boards.

    2. Gathering Your Gear:

    Once you have a solid plan, you'll need the right tools and materials.

    Wood: Choose your wood wisely. The thickness will depend on your gun size and desired security. For a basic case, you might use 1/2" thick boards. If you're going for extra security, consider 3/4" or even 1" thick boards.
    Fasteners: You'll need screws or nails for assembly. Use screws for a stronger hold and countersinking for a clean look.
    Hinges: Choose strong, sturdy hinges for the lid. You might even want to add locking hinges for an extra layer of security.
    Locking Mechanism: You can get creative here. A simple padlock and hasp will work, or you could integrate a more complex locking system.
    Padding: Protect your precious firearms with foam, felt, or even carpet. It adds a layer of cushioning and prevents scratches.
    Tools: Get your essential woodworking tools ready: saw, drill, hammer, sander, measuring tape, pencil, clamps.

    3. Constructing the Case:

    Now it's time to get your hands dirty! Here's the basic construction process:

    Cut the wood: Using your saw, cut your boards to the exact dimensions you've planned. It's best to measure twice and cut once.
    Assemble the sides: Use glue and screws to attach the side panels of the case. Make sure they're square and secure.
    Attach the bottom: Securely attach the bottom panel to the sides, making sure it's flush.
    Build the lid: Create the lid using the same technique as the bottom. Make sure the lid fits snugly on the case.
    Install the hinges: Attach the hinges to the lid and the case body. Make sure they're aligned properly and strong enough to support the weight of the lid.
    Add the locking mechanism: Attach your chosen locking mechanism to the lid and case body.
    Add padding: Once your case is assembled, line the inside with your chosen padding material.

    4. Finishing Touches:

    Time to make your case look fantastic!

    Sanding: Smooth out any rough edges or imperfections with sandpaper.
    Finishing: Choose a finish for your case. You could use a clear stain, paint, or even a natural oil to protect the wood.
    Final touches: Add any decorative elements you like, like brass accents, wood inlays, or custom lettering.

    Security Tips:

    While a wooden gun case is a great way to keep your guns organized and out of sight, it's important to remember that it's not as secure as a metal safe.

    Location, Location, Location: Store your case in a secure location. If you can, bolt it down to the floor.
    Heavy Duty Locks: Go for a high-quality lock that's difficult to pick or bypass.
    Concealment: You can further deter thieves by camouflaging your case in plain sight.
    Layer your security: A wooden case is a great first line of defense, but it's always good to have a backup plan.

    Safety First:

    Always remember, safe storage is crucial.

    Keep it out of reach of children: Lock your case securely and never leave your keys within reach of kids.
    Store unloaded: Always store your firearms unloaded with the safety on.
    Separate ammunition: Keep ammunition stored separately from your guns.

    Building your own wooden gun case is a rewarding project that can give you peace of mind about your firearms. Just remember, safety and security are paramount. Don't just build a case, build a safe haven for your guns!

    Share:

    DIY Birdhouse: How to Make a Beautiful Bird-Friendly Design

    DIY Birdhouse: How to Make a Beautiful Bird-Friendly Design


    Alright, let's talk birds! You know that feeling, right? You see a little feathered friend flitting around your yard, and you just want to give them a cozy place to hang out. Well, building a birdhouse is a wonderful way to do just that. It's not just about attracting birds â€" it's about building a beautiful and functional home for them, and let me tell you, it's a much more rewarding experience than just buying one from the store.

    Before we dive into the building process, let's talk about what makes a birdhouse truly bird-friendly. It's not just about slapping together some wood and calling it a day. We want to create a safe, inviting habitat that birds will actually love. So, let's break down the key elements:

    1. Choosing the Right Design:

    Imagine you're a little bird, looking for a safe place to nest. What would you be looking for? Well, you'd want a secure spot, protected from the elements, predators, and curious squirrels. That's why we need to think about the design.

    Birdhouse Shape: There are tons of birdhouse styles, from simple boxes to elaborate Victorian-inspired designs. But remember, less is more when it comes to birds. A simple, clean design is easier for you to build and more comfortable for the birds.
    Entry Hole: This is key! The size of the entry hole determines which species will be most likely to use the birdhouse. A smaller hole, say 1.25 inches, is perfect for chickadees, titmice, and wrens. A larger hole, 2.5 inches, will attract robins, bluebirds, and even woodpeckers.
    Roof Design: A slanted, overhanging roof is essential to keep rain and snow from getting in. Think about how you'd design a shelter!
    Ventilation: A small ventilation hole on the side or bottom of the birdhouse ensures good air circulation, which is important for keeping the chicks healthy and comfortable.

    2. Choosing the Right Wood:

    Now, let's talk about the building blocks â€" the wood! The best choice? Definitely cedar or redwood. They naturally resist rot and bugs, so your birdhouse will last longer. But if you're on a budget, you can also use pressure-treated pine or spruce, just make sure it's free of chemicals that could harm the birds.

    3. Building Your Birdhouse: A Step-by-Step Guide:

    Alright, let's get our hands dirty! We'll start with a simple birdhouse design, perfect for beginners.

    Materials You'll Need:

    Wood: 1x6 cedar or redwood boards (or equivalent)
    Screws: 1 1/2" wood screws
    Measuring tape: For accuracy
    Pencil: For marking
    Hand saw or jigsaw: For cutting the wood
    Drill: For pilot holes
    Sandpaper: For a smooth finish
    Wood glue: For extra strength (optional)
    Paint or stain (optional): For a personalized look

    Instructions:

    1. Cutting the Pieces:
    Cut two pieces of wood for the front and back panels, measuring 6" tall and 6" wide.
    Cut two pieces for the side panels, measuring 6" tall and 4" wide.
    Cut one piece for the bottom panel, measuring 6" wide and 4" long.
    Cut one piece for the roof, measuring 8" wide and 6" long.

    2. Creating the Entry Hole:

    On one of the front panels, use a pencil to mark the location and size of the entry hole. A 1.25" diameter hole is perfect for smaller birds.
    Use a drill bit slightly smaller than your desired hole size to drill a starting hole.
    Carefully enlarge the hole to your desired size using a jigsaw or hand saw.

    3. Assembling the Birdhouse:

    Place the front and back panels parallel to each other, with the entry hole facing out.
    Align the side panels, so they fit snugly between the front and back panels.
    Attach the panels using screws, pre-drilling pilot holes to prevent the wood from splitting.
    Attach the bottom panel to the base of the birdhouse, ensuring it's flush with the side panels.
    To create the roof, carefully slope the roof panel by cutting a 1-inch angle on each end of the board using a saw or a jigsaw. This will create a slanted roof to help prevent water from pooling.
    Attach the roof panel to the top of the birdhouse, using screws.

    4. Finishing Touches:

    Sand the entire birdhouse, smoothing out any rough edges.
    If desired, paint or stain the birdhouse with a non-toxic paint.
    Consider adding a small perch, approximately 2 inches long, just below the entry hole to give birds a convenient landing spot.

    5. Adding Extra Bird-Friendly Features:

    For added protection from predators, you can consider adding a predator guard around the entry hole. This can be a simple piece of metal or plastic, shaped like a cone, that makes it difficult for squirrels or snakes to access the nest.
    To prevent the entry hole from clogging with leaves or debris, add a simple overhang above the entry hole.

    6. Placing Your Birdhouse:

    Location, location, location! Choose a spot in your yard that offers good visibility and protection from wind and rain.
    Place it at least 5 feet off the ground and away from any heavy branches that could be knocked down by strong winds.
    Face the entrance hole away from prevailing winds, and make sure it's not in direct sunlight.
    The best time to put up your birdhouse is in the fall or winter, before nesting season begins.

    7. Keeping Your Birdhouse Clean and Inviting:

    Keep the birdhouse clean and safe for the birds by cleaning it out once or twice a year. You can simply use a scrub brush and some mild soap to remove debris and dirt.
    During nesting season, avoid disturbing the birds. If you need to clean the birdhouse, wait until after the young birds have flown.

    Beyond the Basics: Embracing Creativity:

    Remember, building a birdhouse is a chance to express your creativity. You can add embellishments, paint it in vibrant colors, or even create a charming little village of birdhouses for different bird species.

    Think about the birds! Consider which species are most common in your area and choose a design and size that will best suit their needs.
    Have fun! The most important thing is to create a beautiful and functional home for your feathered friends.

    Building a birdhouse is a rewarding experience. It’s a chance to connect with nature, learn new skills, and contribute to a thriving ecosystem. So grab some wood, get creative, and watch as your feathered friends flock to your backyard haven!

    Share:

    Diy wooden gun box project: how to build a high-security box

    Diy wooden gun box project: how to build a high-security box


    Protecting your firearms is paramount, and a well-constructed gun box serves as a cornerstone of responsible gun ownership. While commercially available options abound, building your own wooden gun box offers unparalleled customization, potentially enhanced security, and a unique sense of satisfaction. This guide will equip you with the knowledge and techniques to create a high-security wooden gun box that meets your specific needs.

    I. Planning and Design:

    A. Purpose and Size:

    Determine the purpose: Consider the specific firearms you intend to store and the size of accompanying accessories like optics or cleaning supplies.
    Calculate dimensions: Measure the length, width, and height of your largest firearm and add extra space for padding and secure storage.
    Consider weight: Account for the weight of the box itself and the firearms it will hold.

    B. Material Selection:

    Wood Species:
    Hardwoods: Oak, walnut, cherry, maple offer durability and aesthetic appeal.
    Softwoods: Pine, cedar, and spruce are more affordable but may require additional reinforcement.
    Plywood: Offers strength and stability at a reasonable price.
    Thickness: Choose a thickness appropriate for the weight and size of your firearms and the desired level of security.
    Grain Direction: Pay attention to the grain direction for stability and aesthetic considerations.

    C. Security Features:

    Locking Mechanism:
    Padlocks: Easy to use and readily available, but prone to tampering.
    Keyed Locks: Offer better security, but keys can be lost or duplicated.
    Combination Locks: Durable and tamper-resistant, but require remembering the combination.
    Electronic Locks: Provide advanced security with keypads or fingerprint readers, but may require power sources.
    Hinges: Choose strong, tamper-resistant hinges designed for heavy-duty applications.
    Reinforcements: Consider using steel plates, metal corner brackets, and security screws for added strength and security.
    Interior Padding: Use foam, felt, or other padding materials to protect your firearms from damage and prevent movement within the box.

    II. Construction:

    A. Cutting and Assembly:

    Cut the wood: Use a table saw or jigsaw to cut the wood panels precisely to the desired dimensions.
    Assemble the box: Join the wood panels using mortise and tenon joints, dovetail joints, or sturdy glue and screws.
    Reinforcements: Attach steel plates to the interior of the box, particularly around the locking mechanism and hinges.

    B. Finishing Touches:

    Sanding: Smooth the wood surfaces using progressively finer grit sandpaper.
    Finishing: Apply a clear sealant or a wood stain to protect the wood and enhance its appearance.
    Padding: Line the interior with soft, protective padding to prevent scratching or damage to your firearms.

    C. Installing the Locking Mechanism:

    Choose a location: Select a secure location for the locking mechanism, ensuring it is easily accessible but difficult to tamper with.
    Install the locking mechanism: Follow the manufacturer's instructions carefully for proper installation.
    Test functionality: Ensure the locking mechanism operates smoothly and securely before moving on.

    III. Advanced Security Measures:

    A. Concealed Compartment:

    Create a false bottom: Build a false bottom within the box, creating a secret compartment for additional storage or sensitive items.
    Secure access: Install a hidden latch or lock to access the concealed compartment.

    B. Alarm System:

    Motion sensors: Install a motion sensor alarm that triggers an audible alarm when the box is disturbed.
    Contact sensors: Attach contact sensors to the box that activate an alarm when the lid is opened.

    C. Additional Security Features:

    Camouflage: Paint the box in a discreet color to blend in with its surroundings.
    Weight: Add extra weight to the box to deter theft.
    Anchoring: Securely anchor the box to a floor or wall using strong bolts or chains.

    IV. Maintenance and Care:

    Regular Cleaning: Wipe down the exterior and interior of the box regularly with a damp cloth to remove dust and debris.
    Inspect Locking Mechanism: Regularly check the locking mechanism for wear and tear, and lubricate as needed.
    Padding Inspection: Replace or repair any damaged padding to ensure adequate protection for your firearms.

    V. Safety Precautions:

    Fire Safety: Store the box in a cool, dry location away from direct sunlight and heat sources.
    Storage Location: Choose a discreet and secure location to store the box.
    Child Safety: Keep the box out of reach of children and always lock it securely when not in use.

    VI. Ethical Considerations:

    Legal Requirements: Ensure your gun box complies with all local laws and regulations regarding firearms storage.
    Responsible Ownership: Remember that a gun box is a tool to protect your firearms and ensure responsible ownership.
    Security vs. Accessibility: Strive for a balance between high security and easy access to your firearms in case of emergency.

    Conclusion:

    Crafting a high-security wooden gun box is a rewarding project that blends woodworking craftsmanship with a commitment to safe firearms storage. By carefully considering your needs, selecting quality materials, and implementing robust security measures, you can create a custom-built solution that meets your specific requirements. Remember, a well-constructed gun box serves as a tangible expression of responsible gun ownership, providing peace of mind and safeguarding your valuable firearms.

    Share:

    How to build a wooden gun cabinet for long-term storage

    How to build a wooden gun cabinet for long-term storage


    For responsible gun owners, the secure storage of firearms is paramount. A well-constructed wooden gun cabinet provides not only protection from unauthorized access but also a safe haven to safeguard against environmental factors that can degrade weaponry over time. This comprehensive guide will delve into the process of building a durable wooden gun cabinet, ensuring your firearms are protected for years to come.

    1. Planning and Design:

    Purpose and Capacity: Begin by defining the specific needs of your gun cabinet. Consider the number and types of firearms you intend to store, their dimensions, and any accessories that require space.
    Style and Aesthetics: Determine the overall aesthetic you desire. Do you prefer a traditional, rustic, or modern style? Consider the existing décor and furniture in your space to ensure a harmonious blend.
    Dimensions and Material: Sketch a detailed blueprint outlining the cabinet's dimensions, including interior compartments, shelves, and door configurations. Choose a suitable wood species known for its strength, durability, and moisture resistance. Oak, maple, cherry, and walnut are excellent options, each offering unique visual appeal and varying levels of hardness.
    Hardware and Security Features: Select robust hinges, locks, and security features appropriate for your needs. Consider a combination of mechanical and electronic locks for enhanced protection, and choose hardware from reputable manufacturers.
    Tools and Equipment: Gather the necessary tools and equipment, including a table saw, miter saw, router, drill press, sander, clamps, and a selection of chisels, planes, and screwdrivers.

    2. Construction Process:

    Cutting and Assembling the Frame: Begin by cutting the main frame pieces according to your design, ensuring precise measurements and clean cuts. Assemble the frame using robust wood glue and screws, paying attention to the strength and stability of the joints. For extra strength, consider using dowels, mortise and tenon joints, or biscuits for joinery.
    Building the Shelves and Compartments: Cut and assemble shelves and compartments according to your blueprint, ensuring they fit securely within the cabinet. Consider adding dividers to separate different types of firearms or accessories.
    Door Construction and Installation: Create a secure door with a sturdy frame and solid paneling. Choose appropriate hinges and a robust lock system, ensuring they are properly installed for smooth operation and maximum security.
    Finishing Touches: Sand the entire cabinet smooth, removing any imperfections. Apply a protective finish, such as oil, varnish, or polyurethane, to enhance the wood's natural beauty and provide a durable barrier against moisture, scratches, and spills.

    3. Advanced Construction Techniques:

    Dovetail Joints: For exceptional strength and durability, consider constructing the cabinet's frame and shelves with dovetail joints. These interlocking joints provide immense strength and a visually appealing aesthetic.
    Mortise and Tenon Joints: Another traditional and durable joinery technique, mortise and tenon joints offer exceptional strength and stability.
    Hidden Hinges: For a sleek and modern look, opt for hidden hinges that conceal the hardware, creating a clean and unobstructed surface.
    Interior Lighting: Install LED lighting inside the cabinet to illuminate the interior, facilitating easy access and allowing for detailed viewing of your firearms.
    Dehumidifier: Consider incorporating a small dehumidifier to regulate the internal humidity, preventing the formation of condensation and safeguarding your firearms from rust and corrosion.

    4. Security Considerations:

    Locking Mechanisms: Invest in robust locks with multiple locking points and choose a keyway that is difficult to pick or tamper with. Consider using a high-security lock with a deadbolt mechanism for additional peace of mind.
    Security Features: Incorporate security features like a reinforced door frame, metal plates behind the lock, and tamper-resistant screws to deter forced entry attempts.
    Alarm System: For added protection, integrate a motion sensor alarm system that activates when unauthorized access is detected.
    Safe Room Integration: If your home includes a secure room or vault, consider incorporating the gun cabinet within this space for maximum protection.

    5. Maintenance and Care:

    Regular Inspection: Periodically inspect the cabinet for signs of damage, loose screws, or worn-out components. Tighten any loose fasteners and address any issues promptly.
    Cleaning and Dusting: Dust and clean the cabinet regularly to maintain a clean and dry environment.
    Lubricating Hinges and Locks: Keep hinges and locks lubricated to ensure smooth operation and prevent rusting.
    Temperature and Humidity Control: Maintain a stable temperature and humidity level within the cabinet to protect your firearms from environmental degradation.

    Conclusion:

    A well-constructed wooden gun cabinet provides a secure and durable sanctuary for your firearms. By meticulously planning, using quality materials, and implementing sound construction techniques, you can create a safe and aesthetically pleasing space to safeguard your investments for years to come. Remember that gun ownership comes with a responsibility to ensure the safe and responsible storage of firearms, and a well-built gun cabinet plays a vital role in fulfilling this obligation.

    Share:

    Popular Posts

    Search This Blog

    Powered by Blogger.

    Blog Archive

    Blog Archive

    Recent Posts

    Sample Text


    Pages